Articles
Article
What Are the Types of Candle Wax?
Choosing the right wax is one of the most important steps in candle making. Different types of candle wax can influence everything from scent throw to burn time, and even the visual appeal of the finished product. At The Flaming Candle, we offer a wide variety of high-quality waxes, including soy, paraffin, and wax blends. This guide will explore the types of wax for candles, their unique qualities, and tips to help you choose the best type of candle wax for your needs.
Soy Wax: A Natural Favorite
Soy wax is a natural, renewable wax made from hydrogenated soybean oil. It’s one of the most popular types of candle wax for eco-conscious crafters and consumers.
Benefits of Soy Wax
Clean Burn: Produces less soot compared to other waxes, making it ideal for indoor use.
Long Burn Time: Burns slower, making your candles last longer.
Excellent Scent Throw: Works well with fragrance oils, especially for subtle and natural scents.
Tips for Using Soy Wax
Use the correct wick size to avoid tunneling.
Ensure a steady pour temperature to minimize frosting (a natural white coating that can appear on soy candles).
Paraffin Wax: The Traditional Choice
Paraffin wax is a petroleum-based wax that has been used for candle making for decades. It is known for its versatility and affordability.
Benefits of Paraffin Wax
Strong Scent Throw: Delivers a powerful fragrance, even in large spaces.
Vivid Colors: Allows for vibrant dyeing and coloring options.
Flexible Applications: Suitable for a variety of candle types, from pillars to container candles.
Tips for Using Paraffin Wax
Blend with additives like stearic acid to enhance firmness for pillar candles.
Experiment with fragrance loads for the strongest scent throw.
Wax Blends: Combining the Best of Both Worlds
Wax blends combine two or more wax types to enhance performance. Popular blends include soy coconut and coconut apricot, which offer unique benefits.
Soy Coconut Wax
Eco-Friendly: Combines the renewable properties of soy with the creamy texture of coconut wax.
Smooth Finish: Provides a polished, luxurious appearance.
Great Scent Throw: Supports both natural and bold fragrances.
Coconut Apricot Wax
Soft Texture: Known for its velvety smoothness.
Premium Burn: Offers an even burn with minimal soot.
High Fragrance Load: Allows for rich, complex scents.
Tips for Using Wax Blends
Check the blend’s melting point and pouring temperatures for optimal results.
Test different wick types to achieve the best performance for your specific blend.
FAQs About the Types of Candle Wax
What Is the Best Type of Candle Wax for Beginners?
Soy wax is often recommended for beginners because of its ease of use and clean-burning properties. Its slow burn also allows for a more forgiving crafting process.
What Is the Best Type of Wax for Scent Throw?
Paraffin wax is considered the best type of wax for candles with a strong scent throw, making it ideal for highly fragrant candles.
Can I Use Multiple Waxes in One Candle?
Yes! Combining different types of candle wax, like soy and paraffin, can enhance burn performance, scent throw, or texture.
Which Wax Is Best for Eco-Friendly Candles?
Soy wax and soy blends, such as soy coconut, are excellent choices for environmentally conscious candle makers.
Does the Wax Type Affect Candle Burn Time?
Yes. Softer waxes like soy and wax blends tend to burn slower, while paraffin candles may burn faster depending on their formulation.
Choosing the Best Type of Candle Wax for Your Needs
The best type of candle wax depends on your goals. Are you looking for a clean-burning, eco-friendly option? Soy wax might be your best bet. Do you want bold scents that fill a room? Consider paraffin. Or, if you’re seeking a premium feel with luxurious finishes, explore wax blends like soy coconut or coconut apricot.
Article
How to Make Wickless Candles
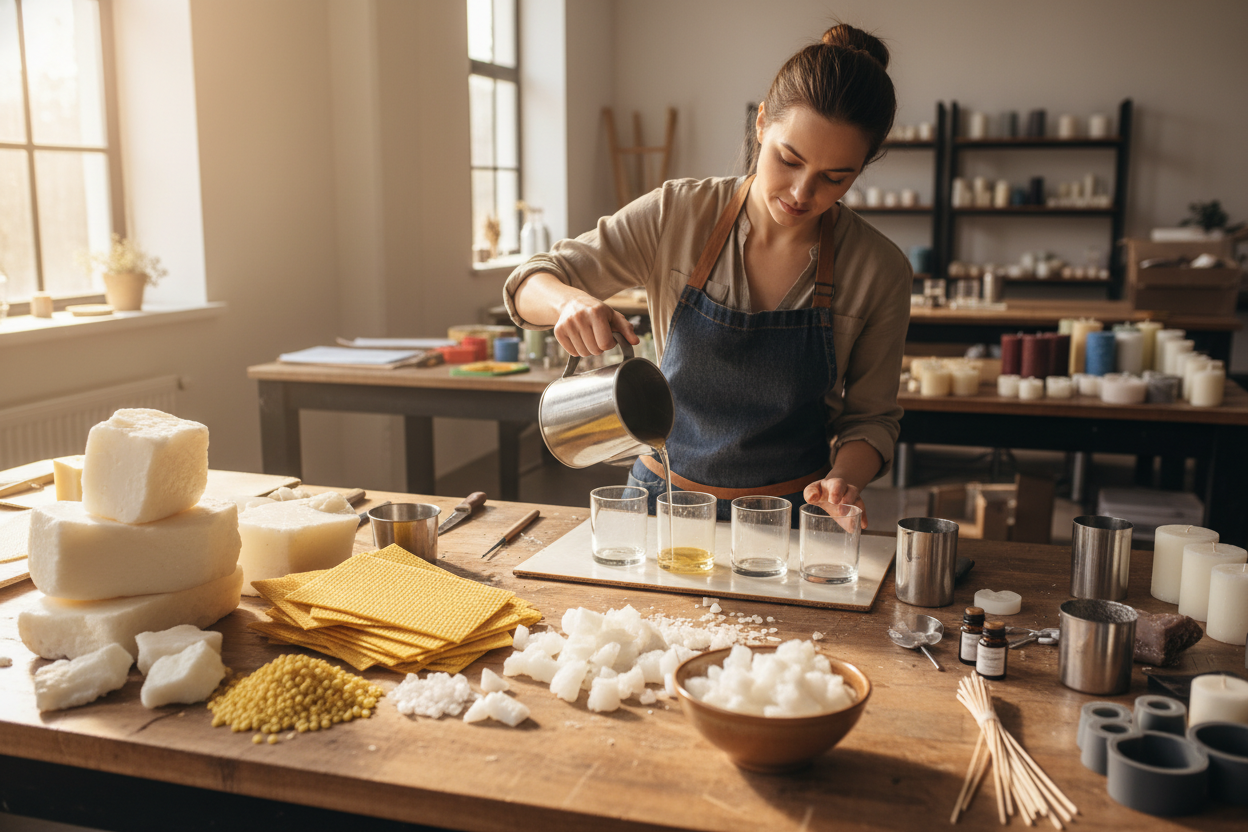
Wickless candles are a unique way to enjoy long-lasting fragrance without an open flame. Whether you're looking for a safer alternative to traditional candles or want to experiment with different scents, making a candle with no wick is a fun and easy DIY project. Follow this guide to create your scented wickless candles at home.
What Are Wickless Candles and How Do They Work?
Unlike traditional candles, wickless candles don’t have a burning wick to release their fragrance. Instead, they are designed to be warmed using a candle warmer or similar heat source, gently melting the wax and dispersing the scent. This method provides a flameless way to enjoy your favorite aromas, making wickless candles an excellent option for homes, offices, and spaces where open flames aren’t ideal.
Benefits of Using a Candle Wickless Alternative
Using a candle-wickless alternative comes with several benefits:
Flame-Free Safety – No open flame means reduced fire risk, making them ideal for homes with pets or children.
Long-Lasting Fragrance – The scent lasts longer than traditional candles since the wax isn't burned.
Minimal Soot and Smoke – Without combustion, no soot or smoke residue keeps your space cleaner.
Efficient Use of Wax – A wax warmer can melt and reuse the entire candle multiple times.
Essential Ingredients and Supplies for Scented Wickless Candles
To make your scented wickless candles, gather the following supplies:
Ingredients:
Wax – Soy wax, beeswax, or paraffin wax are great options.
Fragrance Oils – Choose high-quality fragrance oils designed for candle-making.
Dye (Optional) – Candle dyes or natural colorants can be used for a custom look.
Supplies:
Candle Warmer-Safe Container – Glass jars, tins, or silicone molds work well.
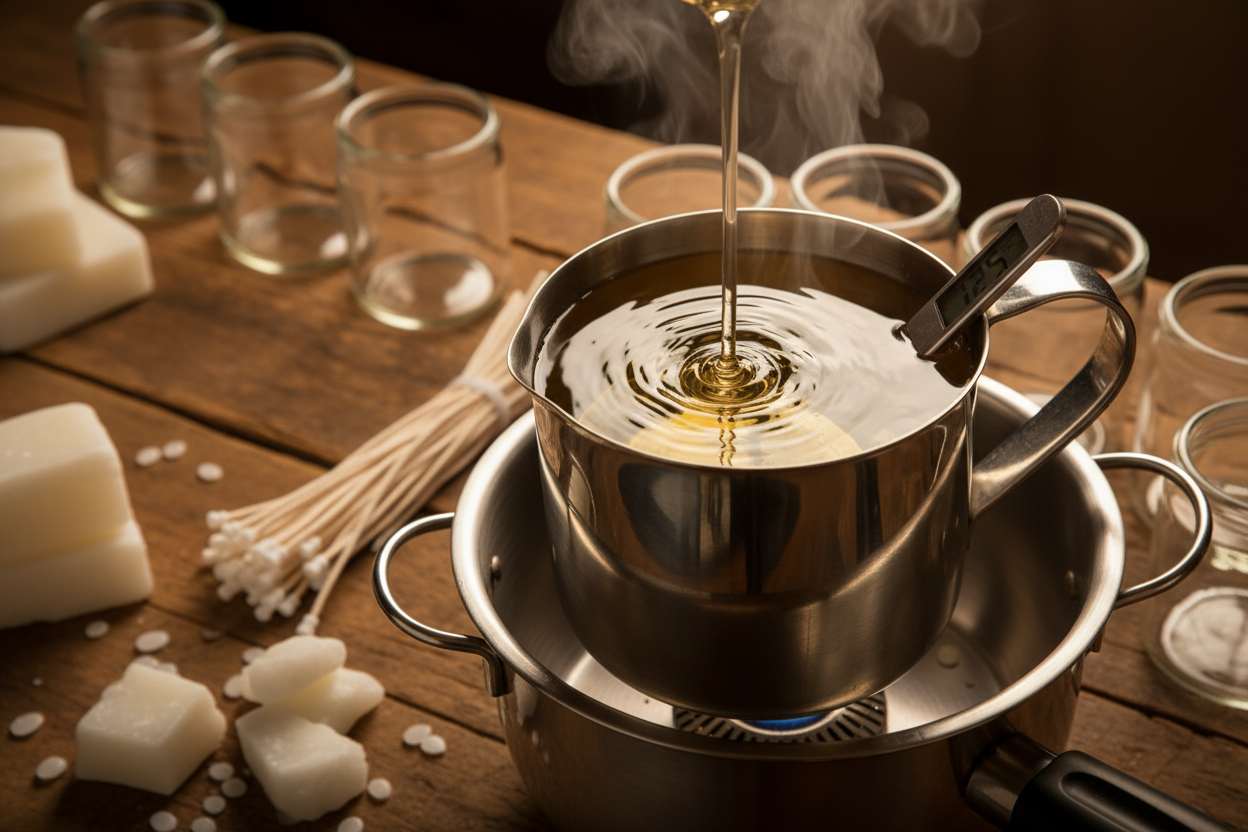
Double Boiler or Microwave-Safe Container – For melting the wax.
Stirring Stick – To blend fragrance and dye into the wax.
Thermometer – To monitor the wax temperature.
Step-by-Step Guide to Making a Candle with No Wick
Melt the Wax – Using a double boiler or microwave, melt your wax to around 175-185°F.
Add Fragrance and Color – Once melted, remove the wax from heat and let it cool slightly before adding fragrance oil (usually about 10% of the total wax weight) and dye if desired. Stir well.*
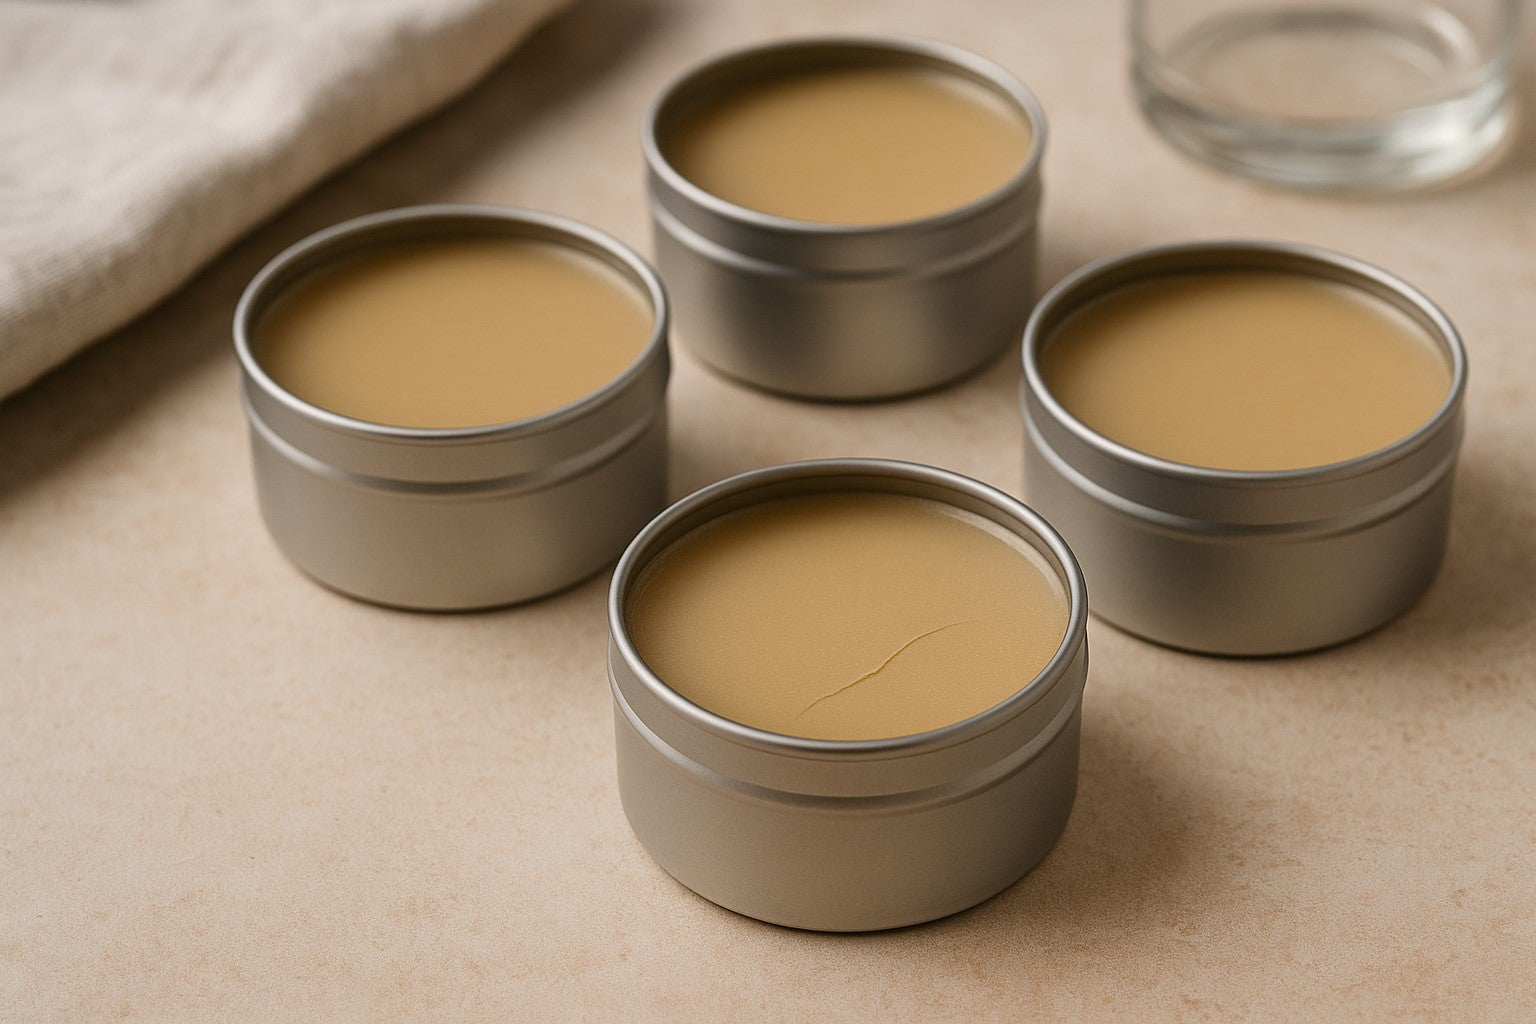
Pour into Containers – Carefully pour the scented wax into heat-safe containers.
Let It Set – Allow the wax to cool and harden completely before using.
Enjoy with a Warmer – Place your wickless candle on a candle warmer and let the heat release the fragrance.
*Refer to IFRA for proper fragrance oil usage.
How to Customize Your Wickless Candles with Scents and Colors
Creating your scented wickless candles allows for endless customization. Try these ideas:
Seasonal Scents – Use cinnamon, pine, or pumpkin spice for a cozy holiday vibe.
Aesthetic Touches – Layer different colored waxes for a gradient effect.
Essential Oils – Blend natural essential oils for an aromatherapy-inspired experience.
Decorative Elements – Embed dried flowers, herbs, or mica powder for a unique look.
Frequently Asked Questions About Wickless Candles
Do wickless candles last longer than traditional candles?
Yes! Since the wax is warmed instead of burned, the fragrance lasts much longer than a traditional candle.
Can I reuse the wax from my wickless candle?
Absolutely! Once the scent fades, simply remelt the wax and add a few drops of fresh fragrance oil.
What type of wax works best for scented wickless candles?
Soy wax and beeswax are great for even melting and a strong scent throw. Paraffin wax also works well if you prefer a stronger fragrance.
Do wickless candles work without a candle warmer?
No, they require a heat source like a candle warmer or wax melter to release the fragrance.
Creating your own wickless candles is a simple and rewarding DIY project. Whether you're making them for personal use or as gifts, these flame-free alternatives provide a safe and long-lasting way to enjoy your favorite scents.
Article
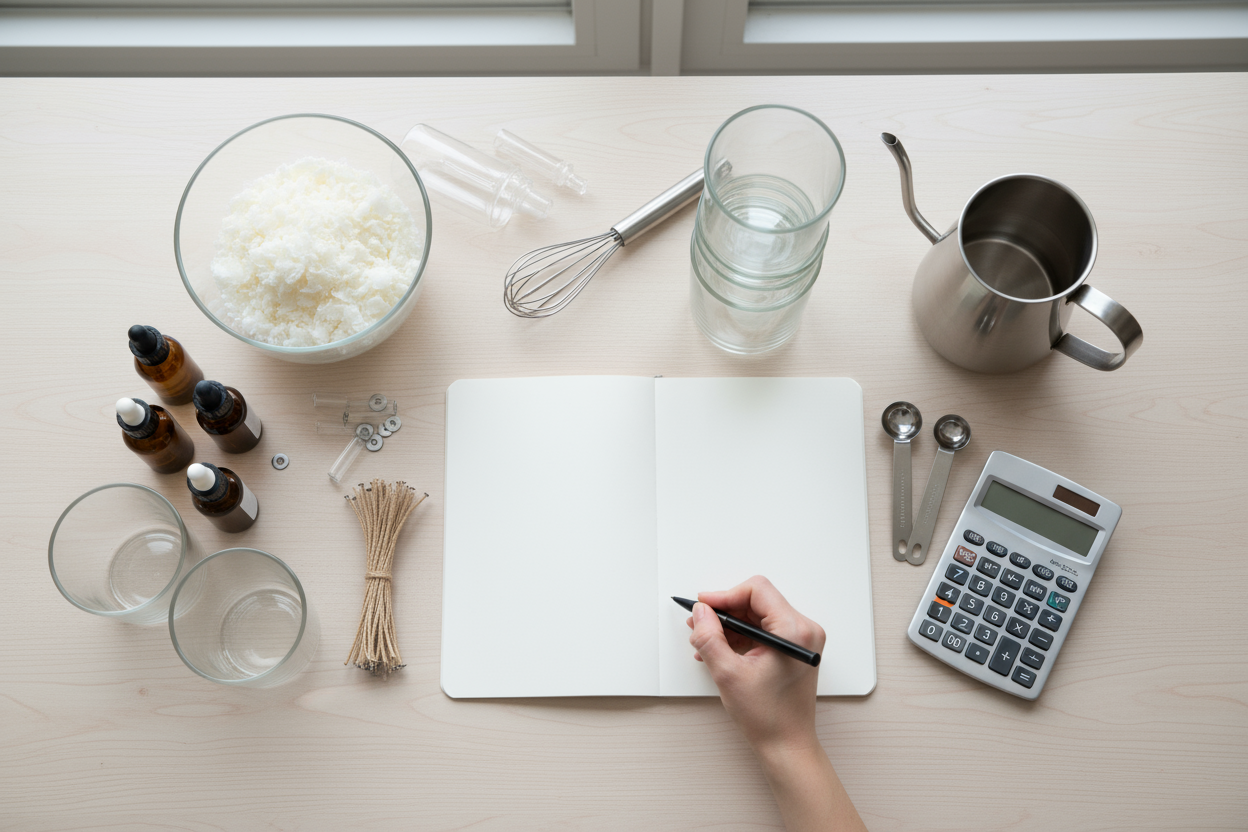
Wax Use Calculator: How Many Candles Can I Make With My Wax?
Planning a candle-making project and wondering how many candles you can create with your wax? Our Wax Use Calculator is the perfect tool to give you quick and accurate answers. Download the calculator to take the guesswork out of your crafting process and plan your candle batches efficiently.
What is a Wax Use Calculator?
A Wax Use Calculator helps candle makers determine the number of candles they can produce based on the total weight of wax they have and the size of each candle container. By factoring in additional components like fragrance oil, the calculator ensures precision in your measurements, saving time and reducing waste. Whether you're a hobbyist or a professional, this tool simplifies your workflow.
Download the Wax Use Calculator
Check out our other calculator tools as well!
How to Use the Candle Wax Calculator
Using the Candle Wax Calculator is straightforward:
Enter the total weight of your wax: A separate calculator is provided to help convert pounds into ounces for use in calculating the rest.
Add the weight of additional components: Include fragrance oil or other additives if applicable.
Specify the amount of wax each container will hold: This is typically the weight provided by the container or mold being used.
Review your results: The calculator will instantly display the total number of candles you can make.
This simple process ensures that your resources are used efficiently, helping you avoid overestimating or underestimating your batch size.
How Many Candles Can I Make With 1lb of Wax?
Knowing how many candles you can make with 1lb of wax depends on understanding your wax-to-container ratio. Here’s a breakdown:
1 lb of wax equals 16 ounces.
Each container’s capacity (in ounces) determines how much wax you’ll use per candle.
For example, if your containers hold 6 ounces of wax each:
1 (total wax weight in pounds) x 16 (ounces per pound) ÷ 6 (wax per container) = 2.67 candles.
This calculation shows that you can make two full candles with a little wax left over. The free candle wax calculator simplifies this by accounting for factors like fragrance oil and container sizes, so you can adjust your recipe accurately and avoid guesswork.
Tips for Accurate Candle Wax Measurements
Use a digital scale: Accurate measurements of wax and fragrance oil are critical for professional-quality candles.
Account for fragrance oil: Incorporate the weight of fragrance oil into your calculations to ensure proper fill levels.
Check your container sizes: Verify the actual wax capacity of your containers to avoid overfilling or waste.
Plan for some excess: It’s always a good idea to have a little extra wax on hand for mishaps or test pours.
Frequently Asked Questions About Candle Wax Calculations
Q: Can I use this calculator for soy wax?
A: Yes! The calculator works with all types of wax, including soy, paraffin, and blends.
Q: How does fragrance oil affect the calculation?
A: Fragrance oil adds weight, so be sure to include it in your total weight to ensure accurate results.
Q: What if my container sizes vary?
A: Use the calculator for each container size separately to get precise totals for mixed batches.
Q: Can I calculate wax usage for wax melts?
A: Yes, simply input the weight of your wax and the capacity of your wax melt molds.
Q: Where can I download the calculator?
A: You can download the Wax Use Calculator on the website.
With our calculator, you’ll always know exactly how many candles you can create, ensuring a smooth and efficient candle-making process. Download it today and enjoy stress-free crafting!
Article
How Much Wax Do I Need?
How Much Wax Per Candle? A Complete Guide
Making candles at home can be a fun and rewarding hobby, but knowing how much wax per candle is crucial for success. Wax is typically measured by weight, and since wax is less dense than water, you’ll need to adjust the volume for your specific container. In this guide, we’ll walk through how much wax you’ll need for various candle sizes, including 8 oz, 10 oz, and 12 oz candles.
How Much Wax to Make a Candle?
To make a candle, it's essential to use the right formula. Start by calculating the volume of your container and convert it to weight. Wax weighs about 20% less than water, so for each candle, you’ll need to use a little less wax than the container's total volume. This ensures you get a well-filled candle without spilling over.
For instance, to figure out how much wax to make a candle, if your container holds 10 oz, you’ll need about 9 oz of wax. This process works for any size container, which leads us to the next section.
How Much Wax for 8 oz Candle?
When making an 8 oz candle, you won’t need a full 8 oz of wax due to the weight-to-volume ratio. You’ll generally need around 6.5 to 7 oz of wax per 8 oz candle container. This will leave enough room for your wick and any fragrance or dye you might want to add.
How Much Wax for 10 oz Candle?
For those working with a 10 oz container, you’ll need about 9 oz of wax to make a candle. As with the 8 oz candle, measuring by weight will give you an accurate result. This ensures a balanced candle without overfilling your container.
How Much Wax for 12 oz Candle?
If you are using a 12 oz container, plan on using roughly 10.5 to 11 oz of wax. This amount allows for a perfect fill without leaving gaps at the top of your candle.
How Much Wax Does It Take to Make a Candle?
Whether you’re making one candle or several, knowing how much wax it takes is essential. To calculate the total amount of wax you need for a batch, multiply the amount of wax needed per candle by the number of containers. If you’re making five 12 oz candles, for example, you’d need about 52.5 oz of wax in total.
Article
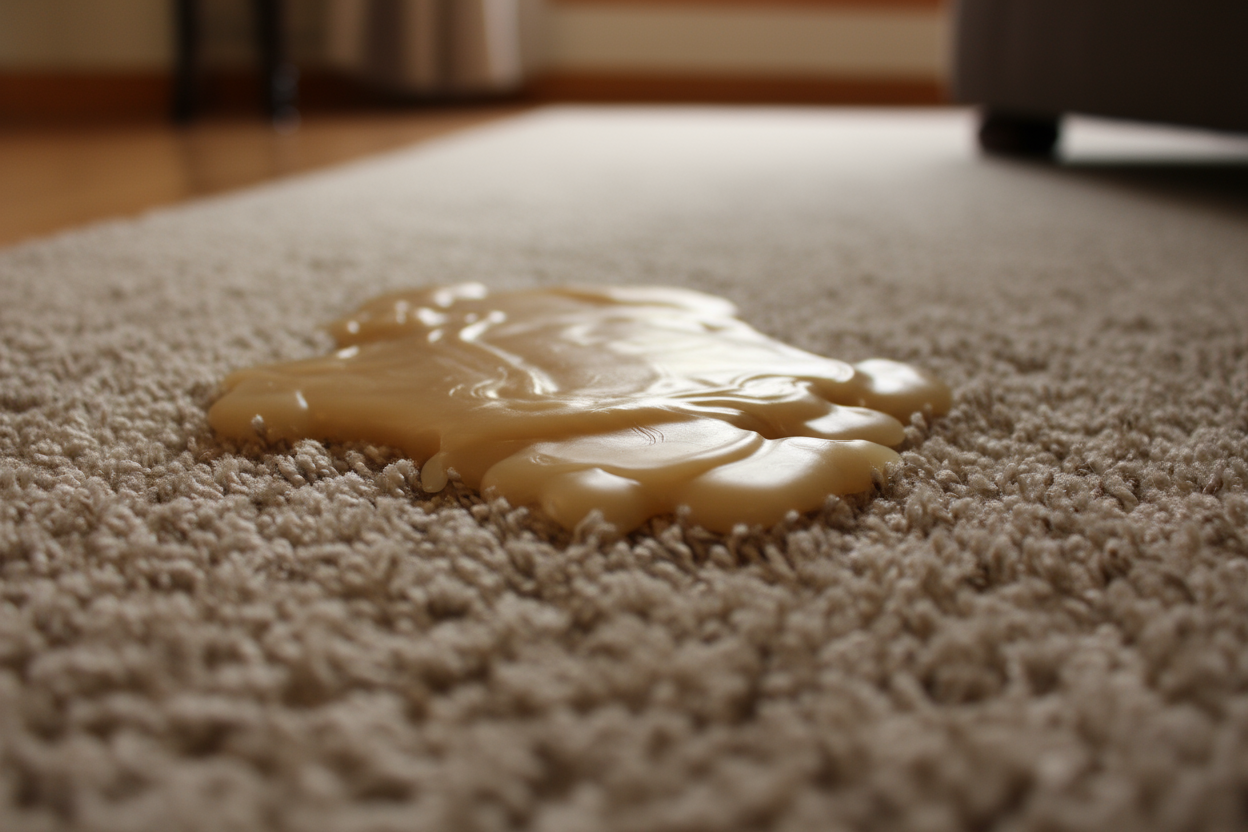
How to Get Wax Out of Fabric, Clothing, and Carpet: A Complete Guide
Spilling wax on your belongings can be frustrating, but with the right techniques, you can easily tackle the problem. Whether you need to know how to get wax out of fabric, remove wax from clothing, or deal with wax stains on carpet, this guide covers everything you need to know. With simple steps and the right tools, you can save your fabrics, clothes, and carpets from permanent damage.
Why Removing Wax Can Be Challenging
Wax hardens quickly, embedding itself into fibers and making it difficult to lift out. Knowing how to get candle wax out of fabric or clothing is particularly tricky, as the wax often leaves behind greasy or colored stains. When it comes to carpets, wax can cling deep within the fibers, making it hard to remove without the right techniques. However, understanding the process and using the right tools can make getting wax out of fabric, clothes, or carpets much easier.
General Steps to Remove Wax
The process for removing wax is generally the same for all surfaces: harden, scrape, and heat. Here’s how to handle getting wax out of fabric, clothing, and carpet:
Harden the Wax: Place an ice cube or ice pack over the wax to solidify it. This makes it easier to remove.
Scrape Away Excess Wax: Use a butter knife or plastic scraper to lift off the hardened wax. Be gentle to avoid damaging the surface.
Heat to Remove Residue: Cover the wax-stained area with a paper towel or clean cloth, then use a warm iron or hairdryer. The heat melts the remaining wax, which the cloth absorbs.
These steps are effective for most materials, but getting candle wax out of clothes, fabric, or carpet requires slight adjustments to avoid damage.
How to Get Wax Out of Fabric
When getting wax out of fabric like curtains, tablecloths, or upholstery, it’s important to use gentle methods to avoid ruining the material. Start by freezing the wax with an ice cube, then scrape it away carefully. After removing the bulk of the wax, cover the stain with a clean paper towel and use a warm iron to draw out the residue. For upholstery, spot-clean with a fabric-safe detergent to eliminate greasy marks.
For tougher stains, especially from colored wax, blot the area with rubbing alcohol or apply a fabric-safe stain remover. Always test any cleaning solution on a hidden area first to ensure it won’t damage the fabric.
How to Get Wax Out of Clothes
Wondering how to get wax out of clothes without ruining your favorite outfit? The process is similar to fabrics, with extra attention to delicate weaves. Start by placing the clothing in the freezer for about 30 minutes to harden the wax. Once frozen, gently scrape off the hardened wax with your fingernail or a dull knife.
Next, lay a paper towel over the wax-stained area and press it with a warm iron. The heat will melt the wax, which the paper towel absorbs. If you’re dealing with dyed wax, pre-treat the area with laundry detergent or a stain remover before washing the garment. Always follow the care label instructions when laundering.
For light-colored clothing, a mixture of warm water and dish soap can help lift residual stains.
How to Get Wax Out of Carpet
Dealing with wax on carpet can be challenging because the wax embeds itself into the fibers. Knowing how to get wax out of carpet effectively requires patience and the right tools. First, harden the wax using an ice cube placed in a sealed bag to avoid soaking the carpet. Then, scrape the wax gently with a butter knife, being careful not to fray the fibers.
Next, cover the wax-stained area with a brown paper bag or clean cloth and use a warm iron to melt the wax. As it melts, the paper will absorb the wax, leaving the carpet clean. For any remaining residue, blot the area with a solution of warm water and dish soap. Finish by vacuuming the area to restore the carpet’s texture.
Frequently Asked Questions About Wax Removal
Q: What’s the best way to remove wax from fabric?
A: The combination of freezing, scraping, and heating works best for getting wax out of fabric. For stubborn stains, use a fabric-safe stain remover.
Q: How do I get candle wax out of clothes without damaging them?
A: Freeze the garment first, then scrape off the wax. Use an iron to melt and absorb the remaining wax. Pre-treat any dye stains before washing.
Q: Can I remove wax from carpet without an iron?
A: Yes, a hairdryer works as a gentler alternative to melt wax when getting wax out of carpet. Be sure to blot the melted wax with a paper towel or cloth.
Q: Why does wax sometimes leave a greasy residue?
A: Some candles contain oils that can leave marks even after the wax is removed. Spot-cleaning with soap or rubbing alcohol can help lift these stains.
Q: Is there a difference in removing colored vs. plain wax?
A: Yes, colored wax is more likely to leave dye stains, so you may need a stain remover or gentle bleach for lighter fabrics.
Conclusion
Learning how to get wax out of fabric, clothing, or carpet doesn’t have to be daunting. By following the steps outlined here and tailoring your approach to the material, you can remove wax stains effectively without causing damage. Whether you’re cleaning your favorite outfit, a cherished tablecloth, or a plush carpet, these tips will help you restore your items to their original condition.
Article
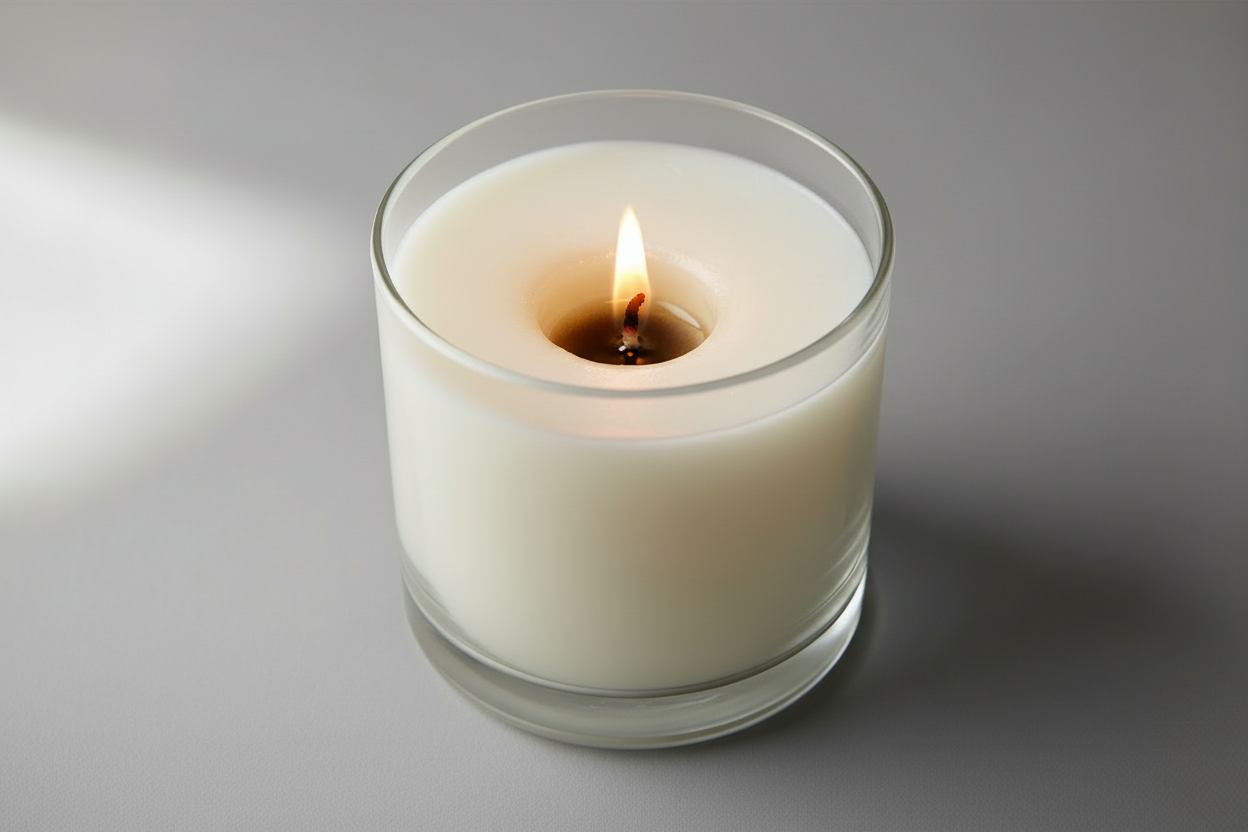
How to Fix Candle Tunneling: A Guide to Saving Your Candles
Few things are as frustrating for candle lovers as candle tunneling—when the wax burns straight down the middle, leaving a wall of unused wax around the edges. Not only does this ruin the candle’s aesthetic, but it also wastes a lot of wax. The good news? Tunneling can often be fixed or prevented with a few simple techniques. This guide will explain how to fix candle tunneling, why it happens, and how to stop it from occurring in the first place.
What is Candle Tunneling?
Candle tunneling occurs when the wax melts unevenly, creating a tunnel down the center of the candle while leaving the outer edges untouched. Instead of burning evenly across the surface, the flame consumes only a small portion of the wax. Over time, the tunnel deepens, making it difficult for the wick to stay lit or for the wax to melt evenly.
Why Do Candles Tunnel?
Understanding why candles tunnel can help you address and prevent the issue. There are several common causes:
Short Burn Times: If you extinguish the candle before the melted wax reaches the edges of the container, it sets unevenly, creating a “memory ring” that restricts future burns.
Wick Size: A wick that is too small for the candle’s diameter may not generate enough heat to melt the wax evenly across the surface.
Wax Type: Some waxes, especially harder varieties, require longer burn times to fully liquefy.
Improper Candle Care: Failing to trim the wick or allowing drafts to affect the flame can lead to uneven burning.
How to Fix Candle Tunneling
If your candle has already tunneled, don’t worry—it can often be salvaged. Here’s how to fix candle tunneling:
Aluminum Foil Method:
Wrap a piece of aluminum foil around the top of the candle, leaving a small opening in the center for the flame.
Light the candle and let it burn for about an hour. The foil traps heat, allowing the wax to melt evenly across the surface.
Spoon or Knife Method:
Once the candle is extinguished and the wax is cool, use a spoon or knife to scrape away the excess wax around the tunnel.
Relight the candle and ensure it burns long enough to reset the wax memory.
Heat Gun or Hair Dryer:
Carefully use a heat gun or hair dryer to melt the top layer of wax until it evens out. Avoid overheating, as this can cause the wick to shift.
How to Prevent Candle Tunneling
Prevention is key when it comes to avoiding the frustration of a tunneling candle. Follow these tips to ensure an even burn:
The First Burn is Critical: Always let the candle burn long enough for the entire surface to melt to the edges during its first use. This creates a full wax pool and prevents memory rings.
Trim the Wick: Keep the wick trimmed to about ¼ inch. A properly trimmed wick ensures a steady, even flame.
Avoid Short Burns: Candles should burn for at least one hour per inch of diameter. For example, a 3-inch-wide candle needs a 3-hour burn to melt evenly.
Store Properly: Keep your candles in a cool, dry place away from direct sunlight to prevent wax from softening or warping.
Choose the Right Wick: When making your own candles, ensure the wick size matches the container’s diameter and the type of wax used.
Frequently Asked Questions About Candle Tunneling
Q: Can all tunneling candles be fixed?
A: Most can, especially if the tunneling isn’t too severe. The aluminum foil method is particularly effective for mild tunneling.
Q: How long should I burn a candle to prevent tunneling?
A: Burn the candle for at least one hour per inch of its diameter. This allows the wax to fully melt across the surface.
Q: Is tunneling more common with certain waxes?
A: Yes, harder waxes like paraffin or beeswax are more prone to tunneling if not burned long enough. Softer waxes like soy are less likely to tunnel.
Q: Can I prevent tunneling in homemade candles?
A: Absolutely! Use the correct wick size for the container, and ensure the wax is evenly poured and set.
Q: Why does my candle wick get buried?
A: This often happens when tunneling worsens and the wax walls collapse inward. Fixing the tunneling before it deepens can prevent this issue.
Candle tunneling doesn’t have to mean the end of your favorite candle. By following these tips to fix candle tunneling and taking preventative measures, you can enjoy a longer, more even burn. Whether you’re rescuing a tunneling candle or ensuring your next one burns beautifully, these strategies will keep your candles looking and performing their best.
Article
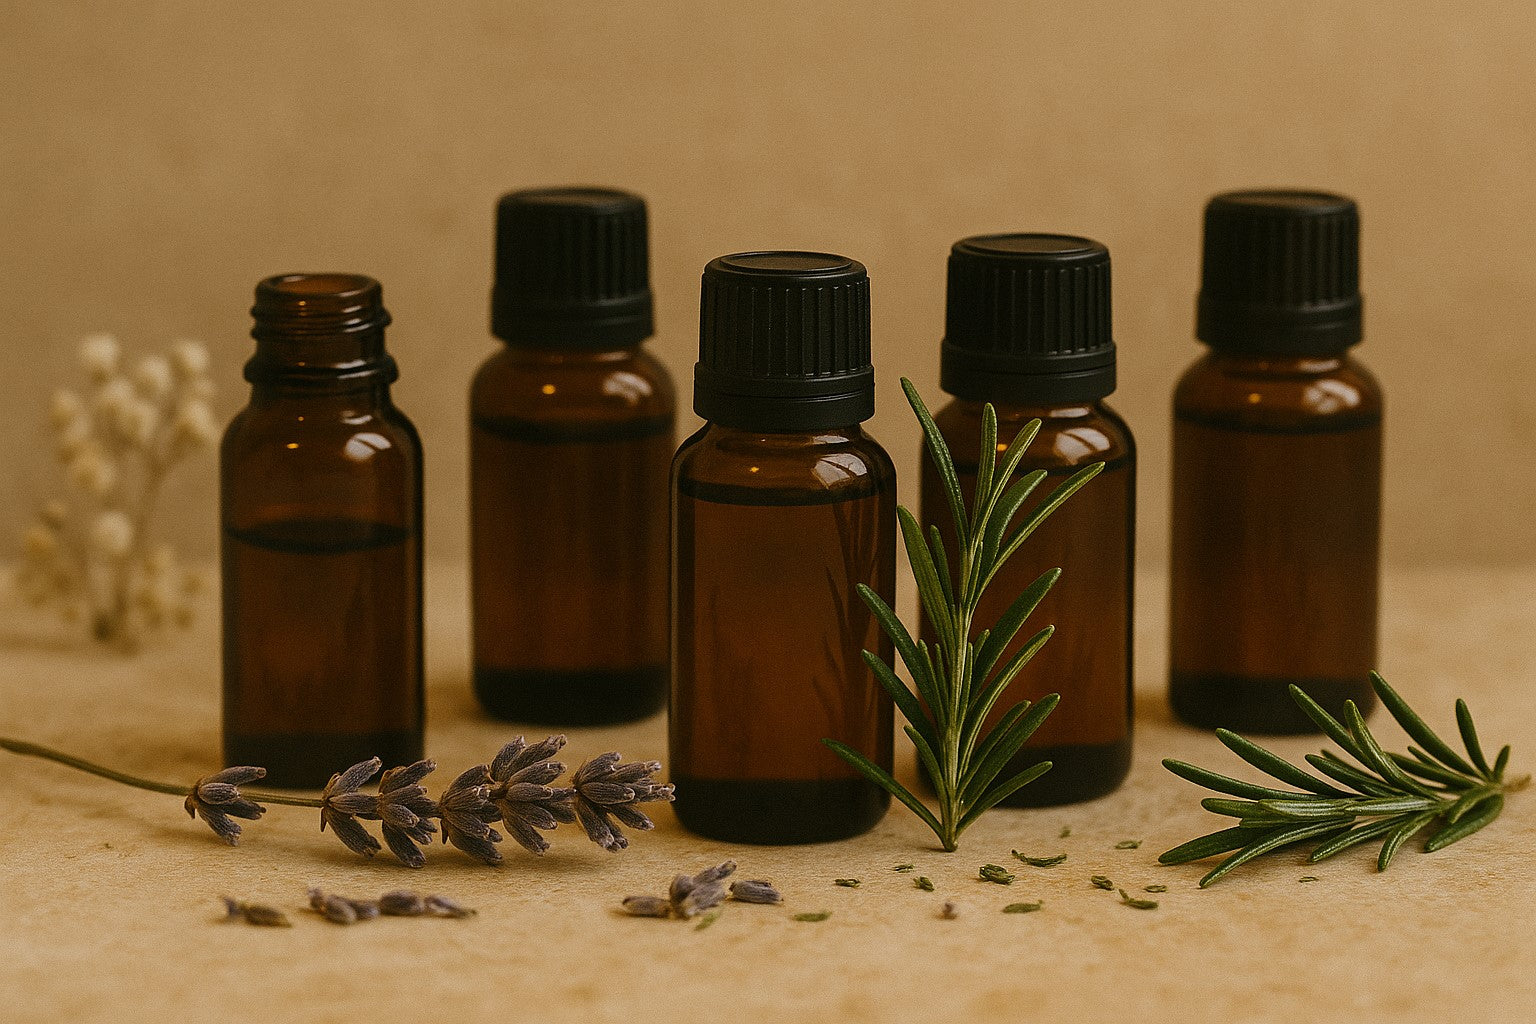
Scents and Aromatherapy Guide
Aromatherapy with candles is popular for a reason. It’s a sensory tool for enhancing mood, focus, and relaxation. Whether you're a seasoned candle maker or just starting out, understanding the differences between fragrance oils and essential oils can help you craft candles that not only smell great but also provide a calming effect.
Fragrance Oils vs. Essential Oils: What's the Difference?
Fragrance OilsFragrance oils for candles are synthetic or blended oils designed specifically for scenting products. High-quality fragrance oils for candles are formulated to be safe and stable when heated, offering a wide range of scents not always available in nature. They provide consistent scent throw and are often the go-to choice for candle makers aiming for specific fragrances.
Essential OilsDerived from plants through methods like steam distillation, essential oils are natural and carry the essence of the source material. Commonly used in aromatherapy, they are known for their therapeutic benefits. However, not all essential oils are suitable for candle making due to their volatility and flash points.
Choosing the Best Candle Scents for Aromatherapy
When selecting scents for aromatherapy candles, consider the desired effect:
Relaxation: Lavender, chamomile, and sandalwood are popular for their calming properties.
Energy Boost: Citrus scents like lemon and orange can invigorate and uplift.
Focus: Peppermint and eucalyptus are known to enhance concentration.
Combining essential oils and fragrance oils can create unique blends that cater to specific moods and preferences.
The 30/50/20 Rule for Blending Oils
For a harmonious scent profile, follow the 30/50/20 rule:
30% Top Notes: These are the first scents perceived and evaporate quickly (e.g., citrus oils).
50% Middle Notes: The heart of the fragrance, providing balance (e.g., lavender, rosemary).
20% Base Notes: These linger the longest and add depth (e.g., sandalwood, patchouli).
This ratio helps in creating well-rounded and appealing scents for candles.
Incorporating Aromatherapy into Candle Making
To create candles that offer aromatherapy benefits:
Select Appropriate Oils: Ensure the oils are safe for candle use and have the desired therapeutic properties.
Use Soy Wax: Soy wax is known for its clean burn and excellent scent throw, making it ideal for aromatherapy candles.
Test Your Blends: Always test your oil blends in small batches to ensure the scent is pleasant and the candle burns safely.
Remember, while candles can enhance mood and ambiance, they are not a substitute for medical treatments.
Final Thoughts
Understanding the nuances between fragrance oils for candles and essential oils allows for more intentional candle crafting. With the right oils and careful blending, you can create candles that smell delightful and are great for aromatherapy.
Note: Always ensure that the oils used are appropriate for candle making and adhere to safety guidelines. The information provided is for educational purposes and not intended to diagnose, treat, or cure any medical conditions.
Article
How to Make Coconut Wax Candles
Coconut wax candles are known for their luxurious finish, excellent scent throw, and eco-friendly appeal. Whether you’re a seasoned candle maker or just starting out, coconut wax for candles is a versatile and rewarding choice. This guide will walk you through the process of making your own coconut wax candles, from selecting the right materials to achieving the perfect finish.
Why Choose Coconut Wax for Candle Making?
Coconut candle wax is made from the oil of coconuts, making it a natural and sustainable option. It offers several benefits for candle makers:
Clean Burning: Produces less soot than paraffin or other waxes.
Luxurious Finish: Has a creamy texture and smooth surface.
Excellent Scent Throw: Carries fragrance well, making your candles more aromatic.
Eco-Friendly: Sourced from a renewable crop with minimal environmental impact.
Coconut wax is also often blended with other waxes like soy or beeswax to enhance its properties, but it can also be used on its own for beautiful results.
Materials You’ll Need
Before you start, gather the following supplies for making coconut wax candles:
Coconut Candle Wax: Available in pure form or blends such as coconut soy or coconut apricot.
Fragrance Oils or Essential Oils: Choose scents that pair well with coconut wax for candles, as it enhances fragrance throw.
Wicks: Select a wick suitable for the size of your container and the type of wax.
Candle Containers: Heat-safe jars or tins.
Double Boiler or Wax Melter: For melting the wax.
Thermometer: To monitor wax temperature.
Mixing Spoon: For blending fragrance and wax.
Glue Dots or Wick Stickers: To secure the wick to the bottom of the container.
Step-by-Step Instructions
Step 1: Prepare Your Workspace
Set up your materials in a well-ventilated area. Ensure your containers are clean and dry. Use wick stickers to secure the wicks to the center of each container. Use a wick holder or chopstick to keep the wick upright.
Step 2: Melt the Coconut Wax
Place the coconut wax in a double boiler or wax melter. Heat it gently, monitoring the temperature with a thermometer. Coconut wax typically melts at 120-140°F. Avoid overheating to preserve its properties.
Step 3: Add Fragrance
Once the wax is fully melted, remove it from the heat and let it cool slightly to about 140°F. Add fragrance oil at the recommended ratio (usually 6-10% of the wax weight). Stir thoroughly for even distribution.
Step 4: Pour the Wax
Let the wax cool further to around 120°F before pouring it into your containers. Pour slowly and steadily to minimize air bubbles. Leave some space at the top of the container for a clean finish.
Step 5: Let the Candles Set
Allow the candles to cool and harden at room temperature for at least 24 hours. Avoid moving them during this time to ensure a smooth surface.
Step 6: Trim the Wicks
Once the candles are fully set, trim the wicks to about ¼ inch. This ensures a clean burn and prevents excessive soot.
Tips for Success with Coconut Wax Candles
Test Different Wicks: Coconut wax has a creamy texture, so testing wick sizes ensures optimal burning.
Use Proper Fragrance Load: Coconut wax for candle making carries fragrance well, but exceeding recommended loads can affect performance.
Blend If Desired: Mixing coconut wax with soy or beeswax can add firmness or extend burn time.
Avoid Overheating: Overheated wax may lose its scent-holding properties or develop a yellow tint.
FAQs About Coconut Wax Candles
Can coconut wax be used on its own?
Yes, coconut wax can be used as a standalone wax. However, some candle makers prefer blends like coconut soy or coconut apricot for added firmness and burn time.
What is the best container for coconut wax candles?
Heat-resistant jars or tins are ideal for coconut wax candles. Ensure they are sturdy and suitable for hot wax.
How do I store coconut wax for candle making?
Store coconut wax in a cool, dry place away from direct sunlight to maintain its quality.
Can I add dyes to coconut wax candles?
Yes, coconut wax holds dye well. Use liquid or block dyes specifically designed for candle making for best results.
Perfect Your Coconut Candle Creation with The Flaming Candle
Making coconut wax candles is a rewarding process that allows you to create beautiful, eco-friendly candles with excellent fragrance performance. Whether you’re crafting for personal use or to start a business, coconut candle wax is a versatile and luxurious choice. Explore The Flaming Candle’s selection of coconut wax for candles and get started on your next candle-making adventure today!
Article
How to Make a Pillar Candle
Pillar candles offer a timeless aesthetic and a satisfying DIY project. With the right materials and technique, you can create elegant, long-burning candles that complement any space.
Choosing the Right Pillar Candle Wax
Selecting the appropriate wax is crucial for successful pillar candle making. Pillar candles require waxes that are firm enough to hold their shape without a container and have good mold release.
Recommended Waxes:
Paraffin Wax: Known for its excellent scent throw and ability to hold color well, paraffin is a popular choice for pillar candles. It has a low melting point, making it suitable for molds and providing a smooth finish.
Soy Wax Blends: While pure soy wax is softer and typically used for container candles, certain soy wax blends are formulated for pillars. These blends offer a natural alternative with good scent throw and mold release.
Beeswax: A natural option that burns longer and cleaner than other waxes. Beeswax has a high melting point and emits a subtle, natural fragrance.
Essential Supplies
Before you begin, gather the following materials:
Pillar candle wax (paraffin, soy blend, or beeswax)
Pillar candle mold (metal, plastic, or silicone)
Wick suitable for the diameter of your mold
Wick sustainer tab
Wick centering device (e.g., wick bar or pencil)
Fragrance oil (optional)
Candle dye (optional)
Double boiler or melting pot
Thermometer
Pouring pitcher
Heat-resistant surface
Step-by-Step Guide to Making a Pillar Candle
Prepare the Mold: Ensure your mold is clean and dry. Insert the wick through the bottom hole, securing it with a wick sustainer. Use a wick centering device to keep the wick centered at the top.
Melt the Wax: Using a double boiler, melt the pillar candle wax to the manufacturer's recommended temperature. Monitor the temperature with a thermometer to avoid overheating.
Add Fragrance and Dye: Once the wax reaches the appropriate temperature, add fragrance oil and dye if desired. Stir gently to ensure even distribution.
Pour the Wax: Slowly pour the melted wax into the mold, leaving a small gap at the top. Tap the mold gently to release any air bubbles.
Cool and Refill: As the wax cools, it may sink in the center. Reheat and pour additional wax to fill any sinkholes, ensuring a smooth top surface.
Unmold the Candle: Allow the candle to cool completely. Gently remove it from the mold by pulling on the wick while angling the mold downward. If the candle is stuck, gently squeeze the sides of the mold or roll it on a flat surface using gentle pressure to help it release.
Trim the Wick: Cut the wick to approximately ¼ inch (6 mm) to ensure a proper burn.
Tips for Success
Mold Release: If you're using a metal mold, consider applying a mold release spray, which acts as a lubricant, to facilitate easier removal.
Fragrance Load: Be mindful of the maximum fragrance load your wax can handle to prevent issues like sweating or poor burn performance.
Testing: Always conduct a burn test with a single candle before producing larger batches to assess performance and make necessary adjustments.
Creating pillar candles allows for customization in shape, color, and scent, making them a versatile addition to any space or product line. With careful attention to detail and quality materials, you’ll craft beautiful candles with radiant, delightful fragrances.
Legal Disclaimer: Always follow safety guidelines when making candles. Use appropriate equipment, work in a well-ventilated area, and never leave melting wax unattended. Ensure that all materials used are suitable for candle making and comply with relevant regulations.
Article
How to Make Marble Candles: A DIY Guide for Stunning Swirl Effects
Marble candles are a creative way to add a touch of elegance and artistry to your home or gift-giving. With their eye-catching swirls and unique patterns, these candles make a statement while being surprisingly simple to create. This guide will show you how to make marble candles step-by-step, helping you master the art of swirling colors for beautiful results.
What Are Marble Candles?
Marble candles are decorative candles featuring intricate, swirling patterns that mimic the natural look of marble. These stunning designs are achieved by blending different colored waxes during the candle-making process. Whether you're making them as gifts, home decor, or for special occasions, marble candles add a sophisticated, artistic flair.
Unlike traditional candles, the beauty of DIY marble candles lies in their unpredictability—no two are exactly alike. This makes each candle a one-of-a-kind creation.
Materials You’ll Need to Make Marble Candles
Before starting, gather the following materials:
Wax: Soy wax or paraffin wax works well for this project.
Wicks: Pre-tabbed wicks appropriate for your candle size.
Fragrance Oil (Optional): Add your favorite scent for a personalized touch.
Candle Dyes: For creating vibrant swirls of color.
Heatproof Containers or Molds: Use glass jars, tins, or silicone molds for your candles.
Double Boiler: To safely melt the wax.
Skewer or Toothpick: For swirling the colors together.
Thermometer: To monitor the wax temperature.
Measuring Cups and Spoons: For precise measurements of wax and fragrance oil.
Step-by-Step Guide to Making Marble Candles
Follow these steps to create your marble candle:
Prepare Your Workspace: Cover your workspace with newspaper or a protective cloth to catch spills. Place your wicks in the center of your containers or molds and secure them with a wick holder.
Melt the Wax: In a double boiler, melt your wax until it reaches 130–140°F (55–60°C). Stir occasionally to ensure even melting.
Add Fragrance (Optional): Remove the melted wax from the heat and let it cool to 120°F (49°C) before adding fragrance oil. Stir thoroughly to distribute the scent evenly.
Divide and Color the Wax: Separate a portion of the melted wax into smaller containers. Add your chosen dyes to these portions to create different colors. Stir until the colors are fully incorporated.
Pour the Base Layer: Pour the uncolored wax into your container, filling it about halfway. Let it sit for a minute or two until a thin skin forms on the surface.
Create the Marble Effect: Pour the colored waxes over the base layer in random patterns. Use a skewer or toothpick to gently swirl the colors together, creating the marble effect. Be careful not to overmix, as this can muddy the design.
Set and Cool: Allow the candle to cool completely at room temperature. Trim the wick to ¼ inch before lighting.
Tips for Perfect DIY Marble Candles
Creating beautiful marble candles requires a bit of precision and creativity. Start by selecting complementary colors—two or three shades that blend harmoniously—for a visually cohesive effect. Work quickly when pouring and swirling the colored wax, as it can harden fast and may affect the design. To achieve a vibrant and well-scented candle, monitor the wax temperature carefully; avoid overheating to prevent dull colors or burned-off fragrance. For added intricacy, try pouring layers and letting each one cool slightly before adding the next, creating more defined swirls and depth in your design. With these tips, your DIY marble candles will look polished and professional.
Customizing Your Marble Candle Design
The beauty of DIY marble candles is the endless customization options. Here are a few ideas to make your candles truly unique:
Add Glitter: Sprinkle a small amount of glitter on top for a shimmering effect.
Incorporate Embeds: Place decorative wax shapes or dried flowers into the candle for added texture.
Play with Fragrances: Combine complementary scents to match the look of your candle, like lavender and vanilla for a soothing vibe.
Experiment with Molds: Use geometric or themed molds to create candles that stand out even more.
Frequently Asked Questions About Marble Candles
Q: Can I use crayons for coloring marble candles?
A: No, crayons are not the proper grade of wax for candle-making and are a fire hazard.
Q: How long do marble candles take to set?
A: It usually takes 4–6 hours for the candle to cool and set completely, depending on the wax type and container size.
Q: Can I use soy wax for marble candles?
A: Absolutely! Soy wax works well and is a great eco-friendly option for DIY marble candles.
Q: What if I overmix the colors?
A: Overmixing can result in a muddy design. To avoid this, swirl the colors gently and stop as soon as you achieve the desired effect.
Creating your own marble candles is a fun and artistic way to add a personal touch to your home decor or gifts. With this guide, you now know how to make swirl candles with ease. Start experimenting with colors and designs, and enjoy the satisfaction of crafting stunning, one-of-a-kind creations!
Article
Candle Making FAQ
New to Candle Making
Q: Which wax should I use?
A: Everyone has different preferences between soy and paraffin. You'll also need to determine if you'll be making container candles or free-standing pillar candles, as these require different wax blends. Pillar wax is made to shrink or contract for easy mold removal.
Read about the different characteristics between soy and paraffin wax >>
Wax Types
Q: What is your bestselling soy container wax?
A: Both the Golden Wax 464 and the Naturewax C-3 are great for new candle makers.
Q: What is your bestselling paraffin container wax?
A: ProBlend 400.
Q: Which wax should I use for pillar candles?
A: For paraffin, we recommend ProBlend 450. For parasoy, we recommend ProBlend 650.
Q: Which wax should I use for tarts and/or wax melts?
A: We carry several tart and pillar blend including Golden Wax 494 soy wax, ProBlend 450 paraffin wax, IGI 4625 paraffin wax, and ProBlend 650 parasoy wax.
Please note - you'll need to perform your own testing to determine the wax that works best for you.
Errors and Troubleshooting
For all your errors and troubleshooting questions check out our troubleshooting page >>
For more help from our team, please submit a support ticket. Most questions are answered within 24 hours.
Article
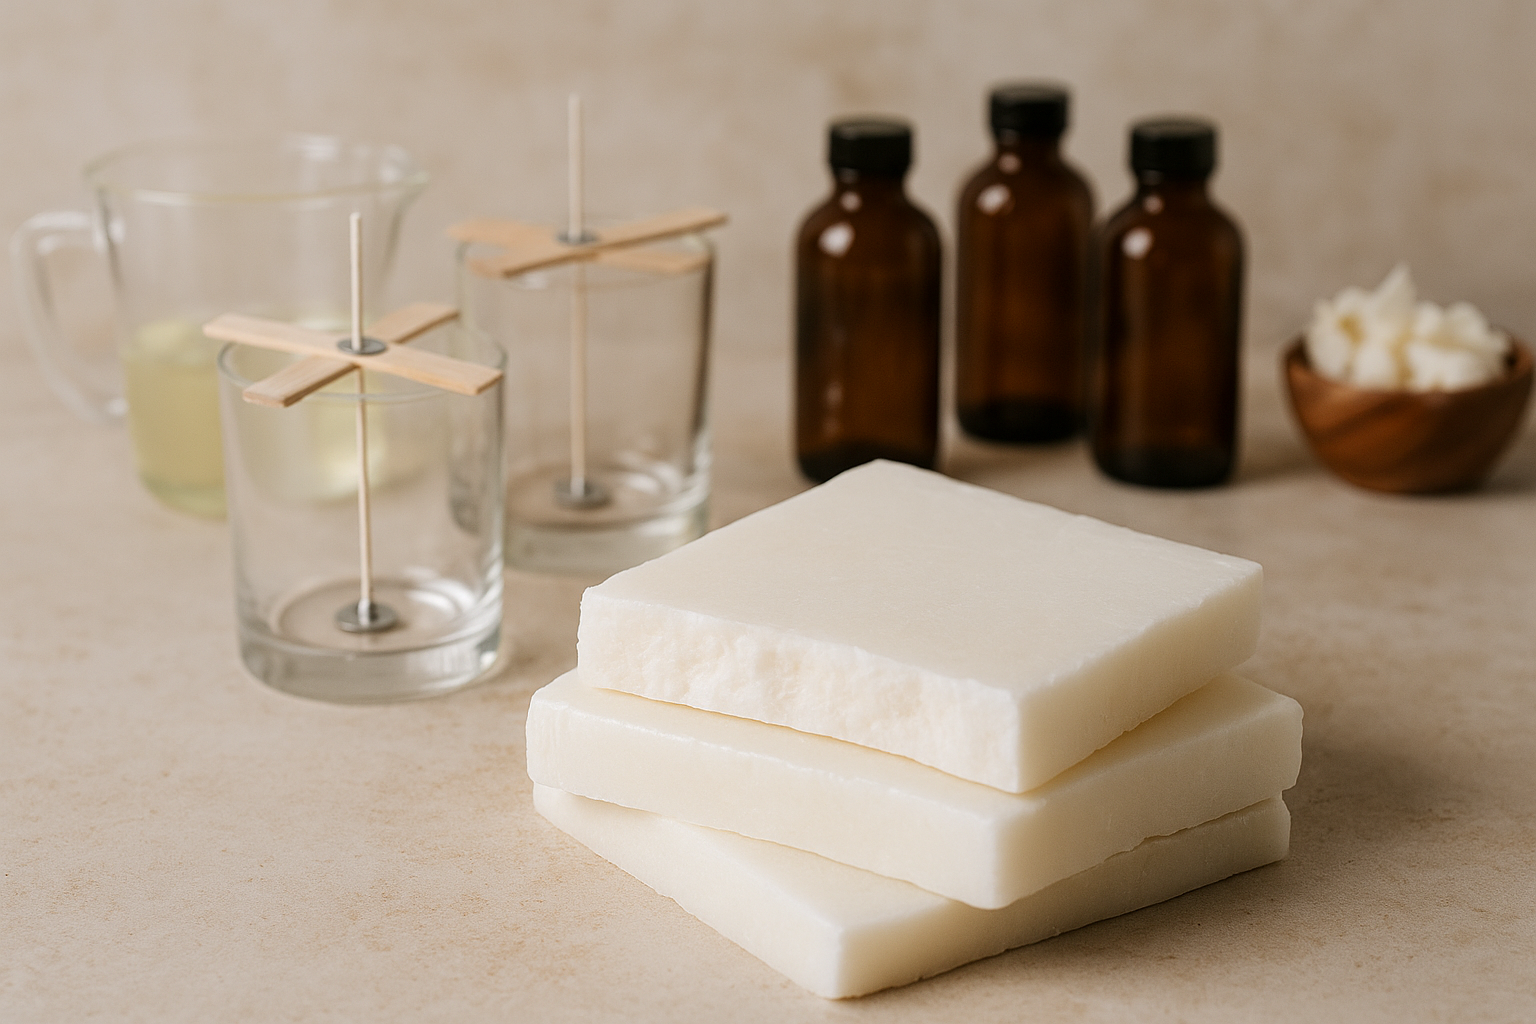
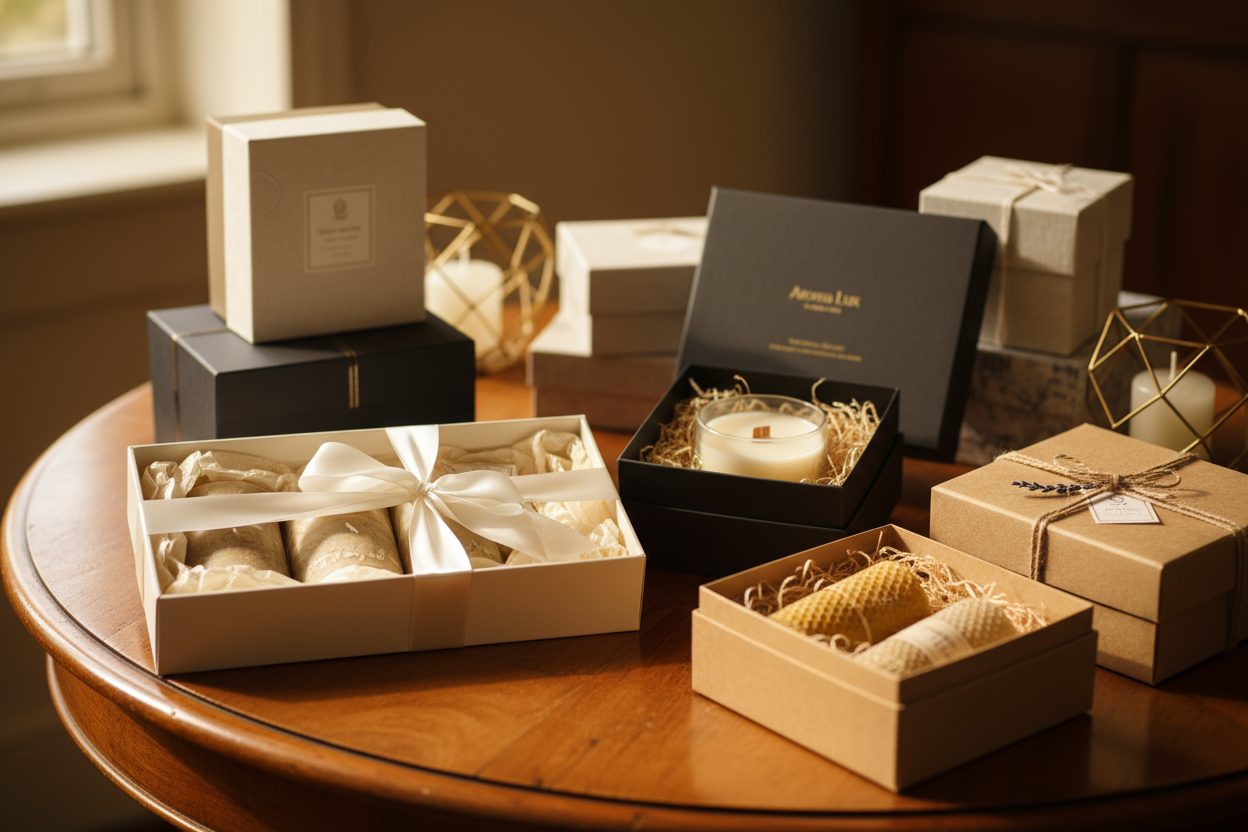
How to Create Stunning Candle Gift Sets, Boxes & Baskets
A candle gift set becomes far more meaningful when it is handmade. Instead of gifting finished candles, assembling a basket or box filled with supplies allows the recipient to experience the joy of making their own. These DIY sets are creative, customizable, and perfect for a variety of occasions.
Why Candle Gift Sets Are the Ultimate DIY Gift
DIY candle gift sets stand out because they combine creativity with practicality. They provide the tools and materials to craft something functional, while also offering an engaging activity. A well-assembled set feels thoughtful and personalized, making it suitable for birthdays, holidays, or moments of appreciation.
For makers, bundling supplies into gift sets also creates opportunities for seasonal collections and themed packaging. Each basket or box is not only a gift, but also an experience waiting to unfold.
What to Include in a Candle Gift Basket or Box
The heart of any DIY candle gift set is the collection of supplies. Wax, fragrance oils, wicks, and containers should always be included, with clear instructions to ensure ease of use. Soy wax starter kits and beeswax kits make excellent foundations, giving recipients the basics to begin creating.
To enrich the gift, you might include additional fragrance oils so the recipient can experiment with different blends. Colorants or mica powders allow for personalization, while small tools such as thermometers or stir sticks make the process smoother. A sturdy basket or rigid box lined with filler not only protects the items but also adds to the excitement of opening the gift.
Examples of Great Candle Gift Add-Ons
Add-ons can transform a simple supply kit into a fully curated experience. A wick trimmer or pouring pot elevates the set by including tools that will be used repeatedly. A small journal for noting scent experiments encourages creativity and exploration. Decorative filler, tissue, or ribbon inside the packaging adds polish, making the kit feel special and ready to give. Each extra detail contributes to the overall sense of care and inspiration.
Types of Candle Gift Sets You Can Make
DIY candle gift sets can be adapted to match the skill level or occasion of the recipient. A beginner’s box may include a soy wax starter kit with pre-measured supplies and a step-by-step guide. A luxury box might feature frosted jars, high-end fragrance oils, and elegant packaging with metallic accents. Seasonal sets can highlight specific themes, such as cinnamon and pine scents for winter or floral and citrus oils for spring and summer.
Matching Candle Types with Themes
Choosing the right supplies helps tie each gift set to a specific mood or event. Aromatherapy-themed sets might focus on eucalyptus or lavender oils paired with natural soy wax. A holiday-inspired basket could feature cinnamon and vanilla fragrances with red or green colorants. Romantic boxes shine with rose, sandalwood, or amber oils, enhanced by decorative jars and elegant lids. By aligning fragrance oils, containers, and packaging, you create cohesive sets that feel intentional and memorable.
Best Candle Making Kits & Supplies to Use
High-quality supplies make all the difference in a candle gift set. Soy wax kits are ideal for beginners due to their clean burn and consistent results. Beeswax kits appeal to those who prefer a natural material with a subtle, honey-like aroma. A variety of fragrance oils gives recipients freedom to explore different profiles, while wicks in various sizes ensure proper burns.
Containers provide both function and style, with tins offering a rustic charm and glass jars delivering a polished, modern feel. Including labels or blank tags adds flexibility for personalization. For those gifting to first-time makers, a candle starter kit with carefully measured ingredients ensures an enjoyable and successful experience.
How to Package Candle Gift Sets Beautifully
Presentation is essential to the appeal of a candle gift set. Choose packaging that secures the supplies while reflecting the theme of the gift. Wooden crates, sturdy baskets, or magnetic closure boxes work well as bases. Line them with shredded paper or fabric to cushion the items, then arrange the supplies in a way that feels organized and inviting.
Including an instruction card helps guide beginners through the process, while decorative touches like ribbons or sprigs of dried herbs make the set feel more personal. The unboxing should feel just as rewarding as the candle-making process itself.
Labeling & Personalization Tips
Labels and personalization provide finishing touches that elevate the experience. You can create custom labels for fragrance oils or containers inside the kit, or include blank labels so the recipient can decorate and name their finished candles. A handwritten note describing the inspiration behind the set adds a thoughtful element. For makers selling DIY kits, branding through cohesive labels, packaging, and color choices reinforces professionalism and creates a lasting impression.
Where to Sell or Share Your Candle Gift Sets
Candle-making gift sets are versatile, making them appealing in both personal and professional contexts. For hobbyists, they make memorable gifts for family and friends. For small business makers, selling curated supply boxes at craft fairs, online marketplaces, or through social media offers a way to connect with audiences who value creative, hands-on gifts.
Styled product photography and packaging demonstrations help potential buyers understand the value of the set. For those producing in larger quantities, sourcing supplies in bulk ensures consistent quality while keeping costs manageable.
Final Tips for Crafting the Perfect Candle Gift Set
The best DIY candle gift sets balance function, creativity, and presentation. Select reliable supplies that make the process enjoyable, then add opportunities for personalization through fragrance choices, colorants, and container styles. Pay close attention to packaging, as thoughtful presentation makes the gift feel more complete.
Above all, remember that each kit is more than just a basket of supplies, it is an invitation to create, to relax, and to craft something beautiful by hand.