


Articles
Article
How to Fix Candle Tunneling
Table of Contents
What Causes Tunneling
How to Fix a Tunneling Candle
How to Prevent Tunneling
FAQ
Wick It Right the First Time
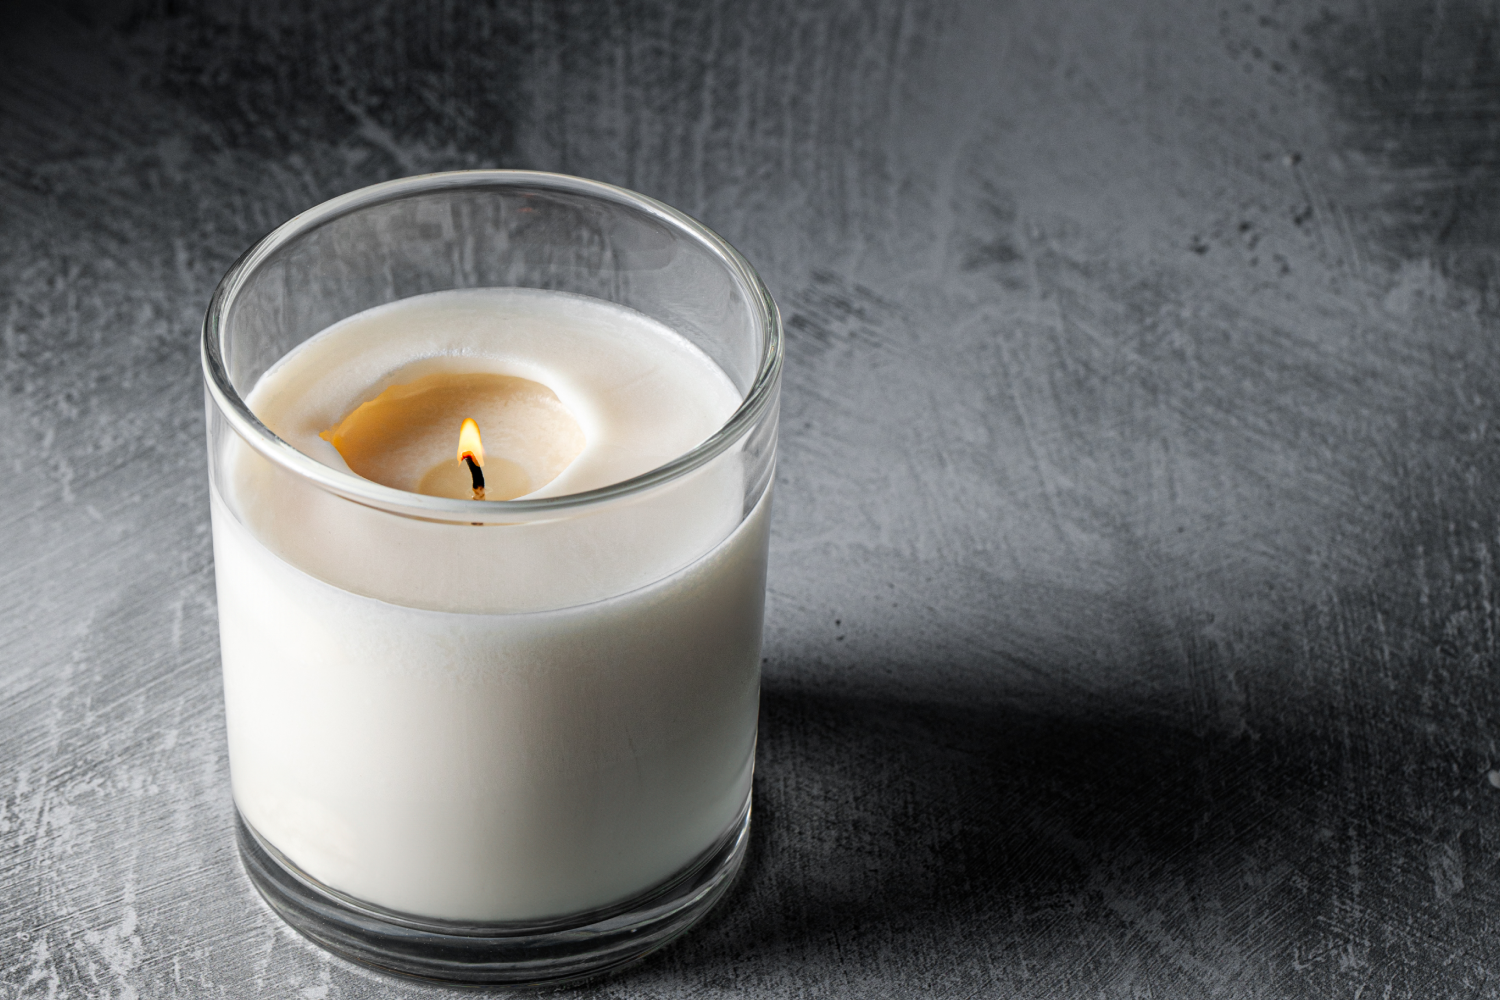
Candle tunneling is what happens when your candle burns straight down the center, leaving a hard wax wall on the sides instead of a clean, even melt pool. It's the most common complaint we hear from burners and makers alike, and the fix is more straightforward than you think. Sizing the wick correctly from the start, straight from the fundamentals we cover in our candle making guide, keeps you from tunneling again after you fix it once.
What Causes Tunneling
A tunnel starts with one of two mistakes, and most tunneling candles have both.
The first is a wick that's too small for the vessel. A wick's job is to pull up enough melted wax to hold a flame that can heat the entire surface, edge to edge. Undersize it, and the flame stays small, the heat stays centered, and the wax at the rim never fully liquefies. Every burn after that eats further down the same narrow column.
The second is a short first burn. Wax remembers. Whatever diameter melt pool you reach on that first burn becomes the ceiling for every burn after it, a phenomenon candle makers call wax memory. Blow the candle out at twenty minutes with only the center melted, and you've set a memory ring that caps every future burn at that same narrow width, no matter how long you let it run from here on.
Tunneling comes from an undersized wick or a too-short first burn that sets a memory ring. Get the wick size right and the first burn full, and tunneling mostly fixes itself.
Wick size isn't a guess. Check the wick size chart against your vessel diameter and wax type before you pour, and cross-reference the wick manufacturer's own spec sheet, since sizing shifts by wax blend and fragrance load.
How to Fix a Tunneling Candle
If you're staring down a tunnel right now, you don't need a new candle. You need foil.
Wrap a sheet of aluminum foil over the top of the candle, tenting it slightly, and poke a hole in the center about the width of the flame.
Light the candle and let it burn like this for one to two hours, checking every thirty minutes, until the melt pool reaches the glass on all sides. The foil traps heat and pushes it outward toward the hardened wax at the rim instead of straight up the wick.
Pull the foil, let the candle finish burning normally, and the tunnel is gone.
Wrap-and-re-melt fixes it once, maybe twice. If the tunnel keeps coming back burn after burn, the problem has stopped being the candle's and started being the wick's. That's your sign to re-wick. Pull the old wick, check it against the wick size chart for your actual vessel diameter and wax type, and go one size up if the current wick sits at or below the recommended minimum.
How to Prevent Tunneling
Prevention always beats the foil trick above.
Burn to a full melt pool on the first burn and use a wick sized to the vessel, and tunneling mostly stops before it starts. Rule of thumb: about one hour of burn time for every inch of container diameter, so a 3-inch vessel wants roughly three hours before that first extinguish. Treat that as a starting range and confirm it against the wax and wick manufacturer's own spec sheet, since blend and fragrance load shift the number. Stop only once the melt pool reaches glass on every side, not just the center. That first burn sets the ceiling for every burn after it, so it earns the wait.
Wick size does the rest of the work. Undersized wicks tunnel, and oversized wicks run the opposite problem. A flame too small and a flame running too tall can both be signs the sizing is off. Get the wick size chart, match it to your vessel and wax, and one decision fixes both directions at once.
A wick sized right for the vessel also throws scent the way it's supposed to. Scent throw depends on a full, hot melt pool doing its job, the same melt pool that keeps you tunnel-free. And if candle soot starts showing up on the glass, that's usually a wick riding too large, a separate fix worth chasing on its own.
Curing matters too. Give fragranced wax its full cure time on the label before that first burn. Wax that hasn't finished curing burns less predictably, melt pools included.
FAQ
Why is my candle tunneling?
Your candle is tunneling because the wick is too small for the vessel, the first burn was too short, or both. A weak flame can't push heat out to the glass, and a short first burn locks in a narrow memory ring. Both mistakes cap every burn after them at that same center column.
How do you fix a tunneling candle?
Wrap foil loosely over the top, poke a center hole about the width of the flame, and burn for one to two hours until the melt pool reaches the glass. This redirects heat outward and re-melts the hardened rim. If tunneling returns after repeated fixes, re-wick one size up from the wick chart.
What is a candle memory ring?
A memory ring is the wax edge left behind by a burn that never reached the glass. Candle wax holds that shape. Every burn after it can only melt back out to that same ring, never past it, which is why one short first burn causes tunneling for the rest of the candle's life.
How long should the first burn be?
Long enough for the melt pool to reach the glass on every side, roughly one hour per inch of container diameter as a starting range. Confirm against your specific wax and wick manufacturer's spec sheet, since fragrance load and wax blend shift the exact number burn to burn.
Wick It Right the First Time
Pull the wick size chart , match it to your vessel and wax, and grab a wick sample pack to test sizes before you commit a full batch to one wick. Tunneling is a sizing problem, not a flaw in the wax. Solve the sizing once and you're done reaching for foil.
Shop wicks sized right for your next pour.
Article
Aromatherapy Candles: A Scent & Mood Guide
Table of Contents
Scents for Relaxing
Scents for Energizing
Scents for Focus & Comfort
Essential Oils vs Fragrance Oils for Aromatherapy
Making an Aromatherapy Candle That Actually Throws
FAQ
Shop Aromatherapy Ingredients
Aromatherapy candles pair scent with mood. Lavender and sandalwood lean relaxing, citrus and peppermint lean energizing. These are scents commonly associated with a mood, not medical claims, and this guide covers the pairings plus how to formulate them so you get the most out of your fragrance.
Aromatherapy candles work by pairing scent with mood, and the pairing matters more than most makers assume. Lavender doesn't calm a room by accident. Citrus doesn't wake one up by luck. Certain fragrances are commonly associated with certain moods, and building a candle around that pairing, at the right load and cure, is what separates a candle that smells nice from one that shifts a room. Scented and aromatherapy-style candles are also one of the fastest-growing corners of the candle market, which means more makers than ever are trying to get this pairing right.
Mood
Scents to reach for
Why it fits
Relaxing
Lavender, chamomile, sandalwood
Soft florals and a warm wood base are commonly tied to winding down
Energizing
Citrus (bergamot, grapefruit, sweet orange), peppermint, eucalyptus
Bright, sharp top notes that read as alert and clean
Focus & comfort
Rosemary, vanilla, cedar
Herbal clarity balanced against a warm, grounding base
Scents for Relaxing
Lavender is the standard-bearer. It’s floral and herbaceous with just enough sharpness that it never reads as soft or one-note. Chamomile leans sweeter and rounder, often blended with lavender or vanilla to take the edge off a bedroom or bath blend. Sandalwood brings the warmth: a creamy, woody base note that grounds a blend and lingers well after the flame's out. All three are commonly associated with unwinding at the end of a day, not because of any medical effect, but because the scent memory runs that deep.
None of these need to work alone. Lavender and chamomile blend cleanly since they share a soft floral backbone, while sandalwood works best layered underneath either one rather than mixed in at equal strength, since a heavy wood base can flatten a delicate floral top note instead of supporting it. Start light on the base note and build up in small increments until the two notes sit evenly and complement each other.
Scents for Energizing
Citrus is the obvious pick: bergamot, grapefruit, and sweet orange are all sharp and bright enough to wake up a kitchen or entryway. Peppermint pushes further, cool and almost electric. Eucalyptus splits the difference, medicinal and crisp, more spa than snack. These scents are commonly associated with alertness and clarity, which is why they show up in morning routines and workout spaces more often than nightstands.
Citrus and peppermint burn fast and bright, which is exactly the point, but they also fade quicker than warmer base notes since top notes are the first thing a nose stops registering. If a candle needs to hold that energizing profile for a longer burn, anchor it with a touch of eucalyptus or a light woody base rather than relying on citrus alone to carry the whole jar.
Scents for Focus & Comfort
Rosemary is herbal and sharp, a scent that earns its spot in focus blends because it reads clean and grounded instead of distracting. Vanilla runs the opposite direction: soft, warm, dessert-adjacent, the scent equivalent of a weighted blanket. Cedar sits in the middle, dry and woody, steady enough for a home office that needs to feel calm without going sleepy. Pair rosemary with a citrus top note for a desk candle, or vanilla with sandalwood for something closer to comfort.
This is also the category where blends earn the most credit for feeling intentional rather than generic. A rosemary-cedar combination reads like a study, not a spa, while vanilla and sandalwood together lean cozier than either scent manages solo. Small ratio shifts change the personality of the blend more than most makers expect, so a test batch before a full pour is always worth it.
Essential Oils vs Fragrance Oils for Aromatherapy
Essential oils are the purist's pick for aromatherapy, and there's a real tradeoff behind that reputation. They tend to have lower flash points, so when poured inside a burning candle they can burn off before ever filling the room, meaning weaker throw for a higher price tag. They perform best around 3 to 5 percent load in soy or beeswax. Fragrance oils, built specifically for candles, throw stronger and hold up more consistently across a full burn, and plenty are formulated to mimic essential oil profiles like lavender or eucalyptus for makers who want that throw without the flash-point ceiling.
We take scent throw personally, and a candle that goes quiet after twenty minutes doesn't get to call itself aromatherapy.
Neither option is wrong. If natural sourcing is the priority, essential oils earn their place. If room-filling scent matters more, fragrance oils get there faster and often more cost effective per pour. The honest answer depends on what the candle is for: a bedside blend meant to be subtle can run on essential oils just fine, while a living room candle meant to fill the space usually needs the extra push fragrance oils provide. For the full breakdown of where each one wins, read our guide on essential oils vs fragrance oils .
Making an Aromatherapy Candle That Actually Throws
Throw comes down to two things most recipes skip: load and cure. Load is how much fragrance goes in relative to wax, and for essential oils that ceiling sits low, around 3 to 5 percent in soy or beeswax, before the scent turns thin or the wax struggles to hold it. Fragrance oils tolerate more, often up to 10 percent depending on the wax and the supplier's spec sheet, so check that number before you pour rather than after. If you're building your first candle from scratch, our candle making guide covers the base process this all builds on.
Cure matters just as much as load. A candle needs one to two weeks resting before the fragrance fully binds to the wax, and cutting that short is the fastest way to end up with a candle that smells strong in the jar and does nothing once it's lit. Soy and beeswax hold essential oils more evenly than harder waxes, which is part of why both show up so often in aromatherapy formulations specifically. Get the load and the cure right and a modest essential oil blend can still fill a room. Skip either step, and even the priciest fragrance oil won't save the batch. For a deeper walkthrough on getting scent throw right across any wax, our guide covers it wax by wax.
A small test batch beats a full pour every time, especially with essential oils, since their behavior shifts more between suppliers and even between harvests than a standard fragrance oil's does. Pour a few sample jars at different loads within that 3 to 5 percent range, let each one cure the full two weeks, then burn them side by side. The difference between a candle that fills a bedroom and one that barely clears the nightstand usually comes down to a percentage point.
FAQ
What are the best scents for relaxation?
Lavender, chamomile, and sandalwood are the scents most commonly associated with relaxation. Lavender brings a floral, herbaceous calm, chamomile softens it further, and sandalwood adds a warm, woody base that lingers. None of these are medical treatments, but the scent memory around them runs deep enough to make them a reliable starting point for a wind-down candle.
Do aromatherapy candles really work?
Aromatherapy candles don't treat medical conditions, but scent is closely tied to memory and mood, which is why certain fragrances are commonly associated with relaxing or energizing. How much a candle “works” depends on the person and the moment, though a well-formulated candle with the right load and cure will throw enough scent to genuinely shift how a room feels.
Can you use essential oils in candles?
Yes, essential oils work in candles, though they behave differently than fragrance oils. They have lower flash points and can burn off before filling a room, so they perform best around 3 to 5 percent load in soy or beeswax. Push past that range and the wax often can't hold the extra oil, so throw decreases instead of improving.
Which is better for aromatherapy, essential oil or fragrance oil?
Essential oils suit aromatherapy candles best when natural sourcing is the priority, though they throw weaker and cost more. Fragrance oils are engineered for candles and throw stronger across a full burn. Neither is objectively better. The choice comes down to what matters more: natural origin or room-filling performance.
Shop Aromatherapy Ingredients
Every blend above starts the same way: pick your scent, pick your oil, test a batch before committing to a full pour. Shop essential oils and fragrance oils and see what actually throws in your wax.
Article
How to Make Coconut Wax Candles
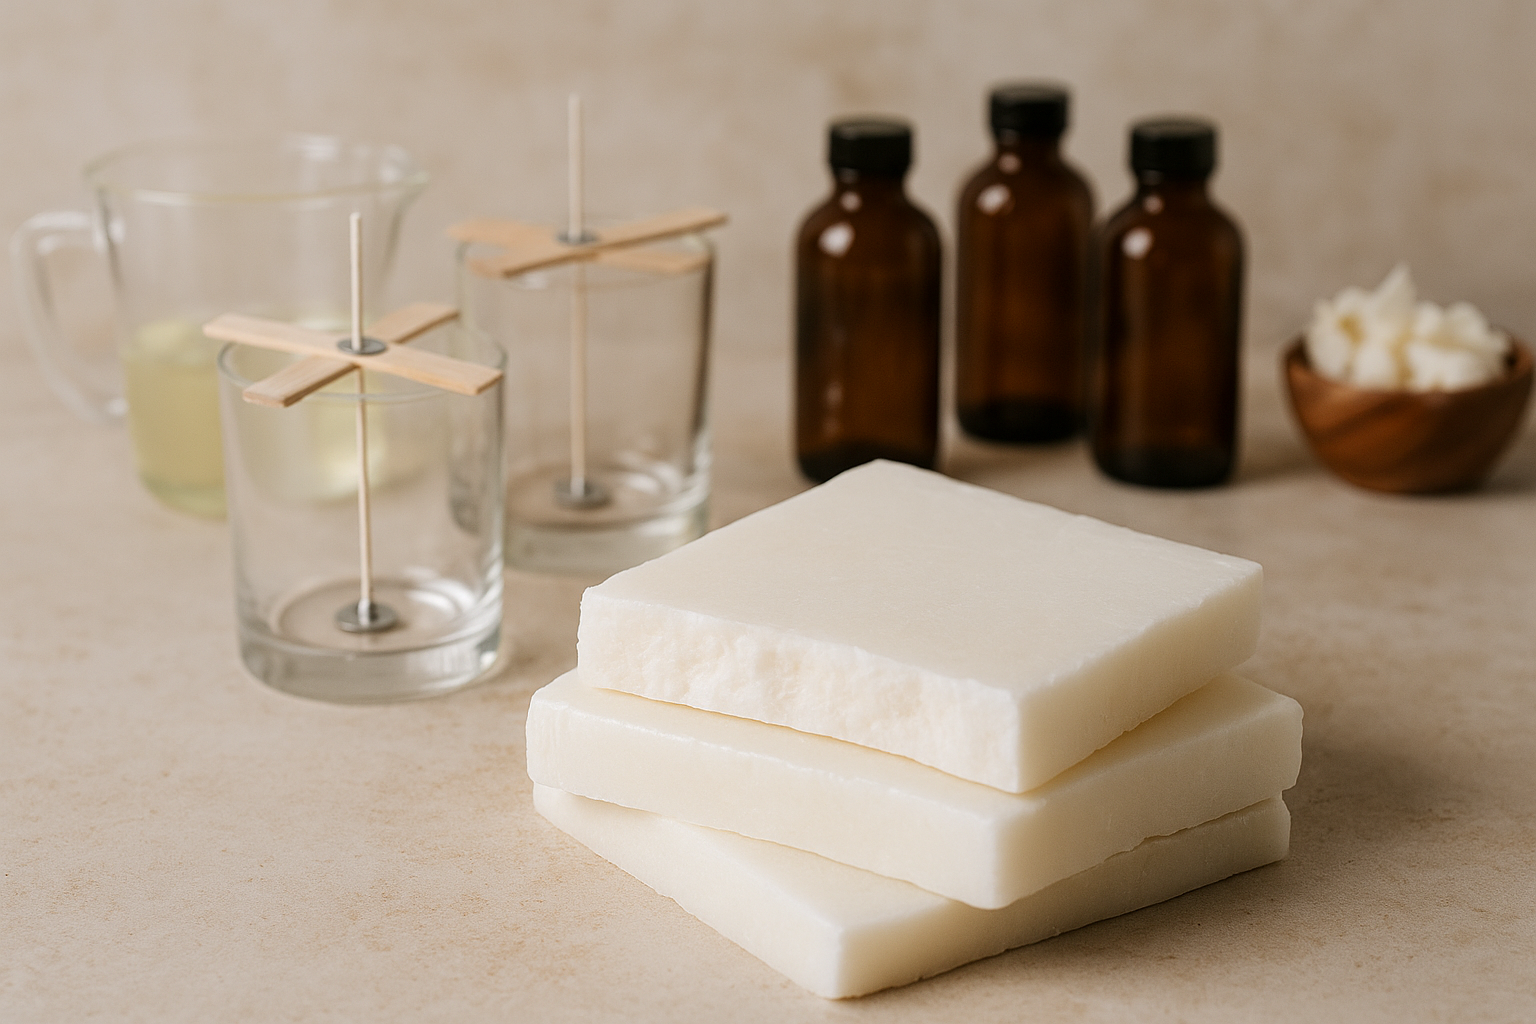
Coconut wax candles are known for their luxurious finish, excellent scent throw, and eco-friendly appeal. Whether you’re a seasoned candle maker or just starting out, coconut wax for candles is a versatile and rewarding choice. This guide will walk you through the process of making your own coconut wax candles, from selecting the right materials to achieving the perfect finish.
Why Choose Coconut Wax for Candle Making?
Coconut candle wax is made from the oil of coconuts, making it a natural and sustainable option. It offers several benefits for candle makers:
Clean Burning: Produces less soot than paraffin or other waxes.
Luxurious Finish: Has a creamy texture and smooth surface.
Excellent Scent Throw: Carries fragrance well, making your candles more aromatic.
Eco-Friendly: Sourced from a renewable crop with minimal environmental impact.
Coconut wax is also often blended with other waxes like soy or beeswax to enhance its properties, but it can also be used on its own for beautiful results.
Materials You’ll Need
Before you start, gather the following supplies for making coconut wax candles:
Coconut Candle Wax: Available in pure form or blends such as coconut soy or coconut apricot.
Fragrance Oils or Essential Oils: Choose scents that pair well with coconut wax for candles, as it enhances fragrance throw.
Wicks: Select a wick suitable for the size of your container and the type of wax.
Candle Containers: Heat-safe jars or tins.
Double Boiler or Wax Melter: For melting the wax.
Thermometer: To monitor wax temperature.
Mixing Spoon: For blending fragrance and wax.
Glue Dots or Wick Stickers: To secure the wick to the bottom of the container.
Step-by-Step Instructions
Step 1: Prepare Your Workspace
Set up your materials in a well-ventilated area. Ensure your containers are clean and dry. Use wick stickers to secure the wicks to the center of each container. Use a wick holder or chopstick to keep the wick upright.
Step 2: Melt the Coconut Wax
Place the coconut wax in a double boiler or wax melter. Heat it gently, monitoring the temperature with a thermometer. Coconut wax typically melts at 120-140°F. Avoid overheating to preserve its properties.
Step 3: Add Fragrance
Once the wax is fully melted, remove it from the heat and let it cool slightly to about 140°F. Add fragrance oil at the recommended ratio (usually 6-10% of the wax weight). Stir thoroughly for even distribution.
Step 4: Pour the Wax
Let the wax cool further to around 120°F before pouring it into your containers. Pour slowly and steadily to minimize air bubbles. Leave some space at the top of the container for a clean finish.
Step 5: Let the Candles Set
Allow the candles to cool and harden at room temperature for at least 24 hours. Avoid moving them during this time to ensure a smooth surface.
Step 6: Trim the Wicks
Once the candles are fully set, trim the wicks to about ¼ inch. This ensures a clean burn and prevents excessive soot.
Tips for Success with Coconut Wax Candles
Test Different Wicks: Coconut wax has a creamy texture, so testing wick sizes ensures optimal burning.
Use Proper Fragrance Load: Coconut wax for candle making carries fragrance well, but exceeding recommended loads can affect performance.
Blend If Desired: Mixing coconut wax with soy or beeswax can add firmness or extend burn time.
Avoid Overheating: Overheated wax may lose its scent-holding properties or develop a yellow tint.
FAQs About Coconut Wax Candles
Can coconut wax be used on its own?
Yes, coconut wax can be used as a standalone wax. However, some candle makers prefer blends like coconut soy or coconut apricot for added firmness and burn time.
What is the best container for coconut wax candles?
Heat-resistant jars or tins are ideal for coconut wax candles. Ensure they are sturdy and suitable for hot wax.
How do I store coconut wax for candle making?
Store coconut wax in a cool, dry place away from direct sunlight to maintain its quality.
Can I add dyes to coconut wax candles?
Yes, coconut wax holds dye well. Use liquid or block dyes specifically designed for candle making for best results.
Perfect Your Coconut Candle Creation with The Flaming Candle
Making coconut wax candles is a rewarding process that allows you to create beautiful, eco-friendly candles with excellent fragrance performance. Whether you’re crafting for personal use or to start a business, coconut candle wax is a versatile and luxurious choice. Explore The Flaming Candle’s selection of coconut wax for candles and get started on your next candle-making adventure today!
Article
How to Make a Pillar Candle
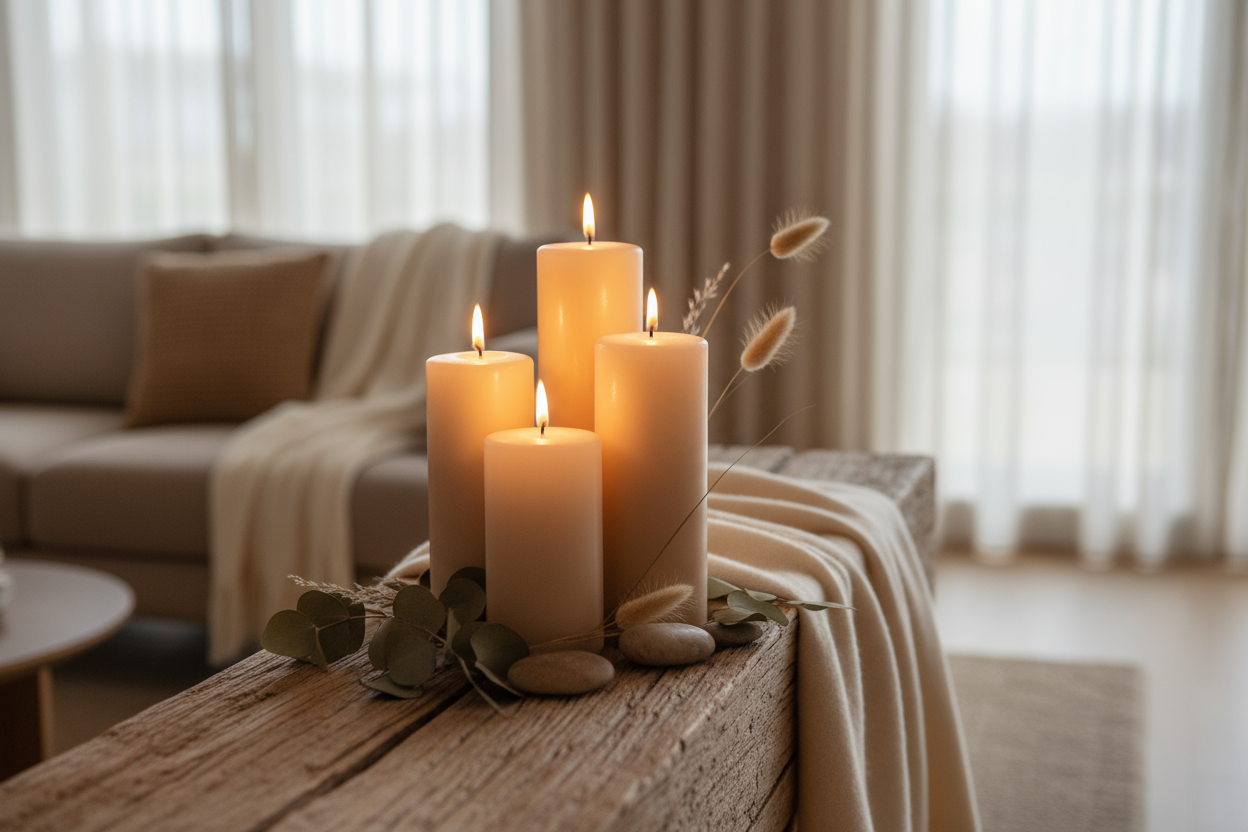
Pillar candles offer a timeless aesthetic and a satisfying DIY project. With the right materials and technique, you can create elegant, long-burning candles that complement any space.
Choosing the Right Pillar Candle Wax
Selecting the appropriate wax is crucial for successful pillar candle making. Pillar candles require waxes that are firm enough to hold their shape without a container and have good mold release.
Recommended Waxes:
Paraffin Wax: Known for its excellent scent throw and ability to hold color well, paraffin is a popular choice for pillar candles. It has a low melting point, making it suitable for molds and providing a smooth finish.
Soy Wax Blends: While pure soy wax is softer and typically used for container candles, certain soy wax blends are formulated for pillars. These blends offer a natural alternative with good scent throw and mold release.
Beeswax: A natural option that burns longer and cleaner than other waxes. Beeswax has a high melting point and emits a subtle, natural fragrance.
Essential Supplies
Before you begin, gather the following materials:
Pillar candle wax (paraffin, soy blend, or beeswax)
Pillar candle mold (metal, plastic, or silicone)
Wick suitable for the diameter of your mold
Wick sustainer tab
Wick centering device (e.g., wick bar or pencil)
Fragrance oil (optional)
Candle dye (optional)
Double boiler or melting pot
Thermometer
Pouring pitcher
Heat-resistant surface
Step-by-Step Guide to Making a Pillar Candle
Prepare the Mold: Ensure your mold is clean and dry. Insert the wick through the bottom hole, securing it with a wick sustainer. Use a wick centering device to keep the wick centered at the top.
Melt the Wax: Using a double boiler, melt the pillar candle wax to the manufacturer's recommended temperature. Monitor the temperature with a thermometer to avoid overheating.
Add Fragrance and Dye: Once the wax reaches the appropriate temperature, add fragrance oil and dye if desired. Stir gently to ensure even distribution.
Pour the Wax: Slowly pour the melted wax into the mold, leaving a small gap at the top. Tap the mold gently to release any air bubbles.
Cool and Refill: As the wax cools, it may sink in the center. Reheat and pour additional wax to fill any sinkholes, ensuring a smooth top surface.
Unmold the Candle: Allow the candle to cool completely. Gently remove it from the mold by pulling on the wick while angling the mold downward. If the candle is stuck, gently squeeze the sides of the mold or roll it on a flat surface using gentle pressure to help it release.
Trim the Wick: Cut the wick to approximately ¼ inch (6 mm) to ensure a proper burn.
Tips for Success
Mold Release: If you're using a metal mold, consider applying a mold release spray, which acts as a lubricant, to facilitate easier removal.
Fragrance Load: Be mindful of the maximum fragrance load your wax can handle to prevent issues like sweating or poor burn performance.
Testing: Always conduct a burn test with a single candle before producing larger batches to assess performance and make necessary adjustments.
Creating pillar candles allows for customization in shape, color, and scent, making them a versatile addition to any space or product line. With careful attention to detail and quality materials, you’ll craft beautiful candles with radiant, delightful fragrances.
Legal Disclaimer: Always follow safety guidelines when making candles. Use appropriate equipment, work in a well-ventilated area, and never leave melting wax unattended. Ensure that all materials used are suitable for candle making and comply with relevant regulations.
Article
How to Make Marble Candles: A DIY Guide for Stunning Swirl Effects
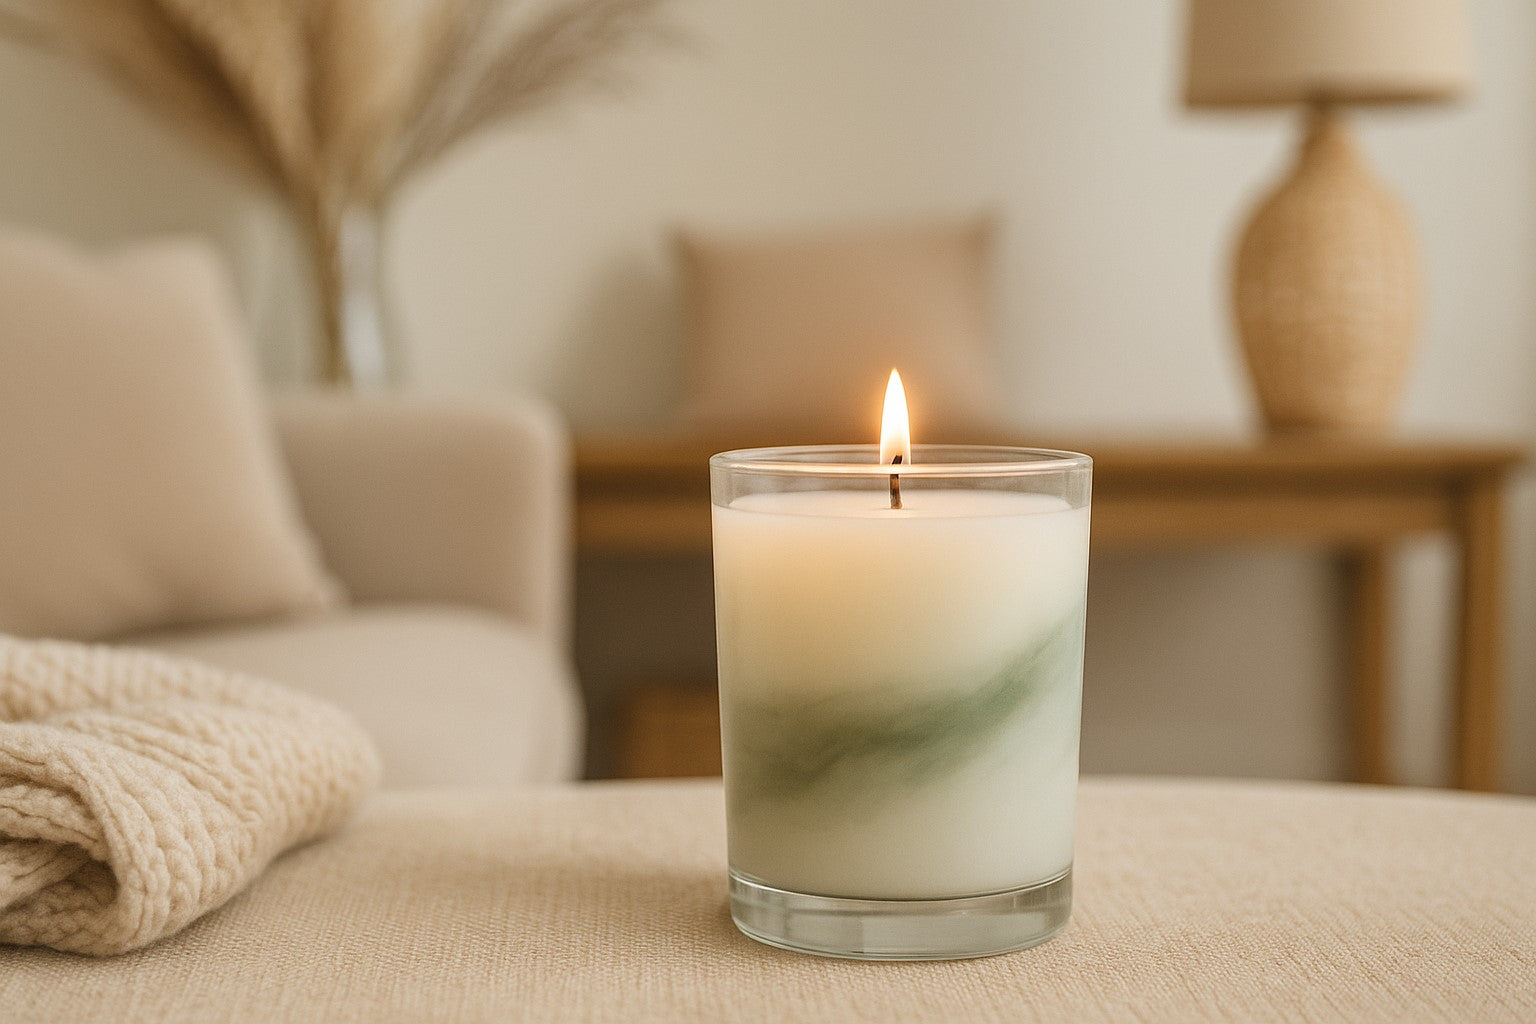
Marble candles are a creative way to add a touch of elegance and artistry to your home or gift-giving. With their eye-catching swirls and unique patterns, these candles make a statement while being surprisingly simple to create. This guide will show you how to make marble candles step-by-step, helping you master the art of swirling colors for beautiful results.
What Are Marble Candles?
Marble candles are decorative candles featuring intricate, swirling patterns that mimic the natural look of marble. These stunning designs are achieved by blending different colored waxes during the candle-making process. Whether you're making them as gifts, home decor, or for special occasions, marble candles add a sophisticated, artistic flair.
Unlike traditional candles, the beauty of DIY marble candles lies in their unpredictability—no two are exactly alike. This makes each candle a one-of-a-kind creation.
Materials You’ll Need to Make Marble Candles
Before starting, gather the following materials:
Wax: Soy wax or paraffin wax works well for this project.
Wicks: Pre-tabbed wicks appropriate for your candle size.
Fragrance Oil (Optional): Add your favorite scent for a personalized touch.
Candle Dyes: For creating vibrant swirls of color.
Heatproof Containers or Molds: Use glass jars, tins, or silicone molds for your candles.
Double Boiler: To safely melt the wax.
Skewer or Toothpick: For swirling the colors together.
Thermometer: To monitor the wax temperature.
Measuring Cups and Spoons: For precise measurements of wax and fragrance oil.
Step-by-Step Guide to Making Marble Candles
Follow these steps to create your marble candle:
Prepare Your Workspace: Cover your workspace with newspaper or a protective cloth to catch spills. Place your wicks in the center of your containers or molds and secure them with a wick holder.
Melt the Wax: In a double boiler, melt your wax until it reaches 130–140°F (55–60°C). Stir occasionally to ensure even melting.
Add Fragrance (Optional): Remove the melted wax from the heat and let it cool to 120°F (49°C) before adding fragrance oil. Stir thoroughly to distribute the scent evenly.
Divide and Color the Wax: Separate a portion of the melted wax into smaller containers. Add your chosen dyes to these portions to create different colors. Stir until the colors are fully incorporated.
Pour the Base Layer: Pour the uncolored wax into your container, filling it about halfway. Let it sit for a minute or two until a thin skin forms on the surface.
Create the Marble Effect: Pour the colored waxes over the base layer in random patterns. Use a skewer or toothpick to gently swirl the colors together, creating the marble effect. Be careful not to overmix, as this can muddy the design.
Set and Cool: Allow the candle to cool completely at room temperature. Trim the wick to ¼ inch before lighting.
Tips for Perfect DIY Marble Candles
Creating beautiful marble candles requires a bit of precision and creativity. Start by selecting complementary colors—two or three shades that blend harmoniously—for a visually cohesive effect. Work quickly when pouring and swirling the colored wax, as it can harden fast and may affect the design. To achieve a vibrant and well-scented candle, monitor the wax temperature carefully; avoid overheating to prevent dull colors or burned-off fragrance. For added intricacy, try pouring layers and letting each one cool slightly before adding the next, creating more defined swirls and depth in your design. With these tips, your DIY marble candles will look polished and professional.
Customizing Your Marble Candle Design
The beauty of DIY marble candles is the endless customization options. Here are a few ideas to make your candles truly unique:
Add Glitter: Sprinkle a small amount of glitter on top for a shimmering effect.
Incorporate Embeds: Place decorative wax shapes or dried flowers into the candle for added texture.
Play with Fragrances: Combine complementary scents to match the look of your candle, like lavender and vanilla for a soothing vibe.
Experiment with Molds: Use geometric or themed molds to create candles that stand out even more.
Frequently Asked Questions About Marble Candles
Q: Can I use crayons for coloring marble candles?
A: No, crayons are not the proper grade of wax for candle-making and are a fire hazard.
Q: How long do marble candles take to set?
A: It usually takes 4–6 hours for the candle to cool and set completely, depending on the wax type and container size.
Q: Can I use soy wax for marble candles?
A: Absolutely! Soy wax works well and is a great eco-friendly option for DIY marble candles.
Q: What if I overmix the colors?
A: Overmixing can result in a muddy design. To avoid this, swirl the colors gently and stop as soon as you achieve the desired effect.
Creating your own marble candles is a fun and artistic way to add a personal touch to your home decor or gifts. With this guide, you now know how to make swirl candles with ease. Start experimenting with colors and designs, and enjoy the satisfaction of crafting stunning, one-of-a-kind creations!
Article
Candle Making FAQ
New to Candle Making
Q: Which wax should I use?
A: Everyone has different preferences between soy and paraffin. You'll also need to determine if you'll be making container candles or free-standing pillar candles, as these require different wax blends. Pillar wax is made to shrink or contract for easy mold removal.
Read about the different characteristics between soy and paraffin wax >>
Wax Types
Q: What is your bestselling soy container wax?
A: Both the Golden Wax 464 and the Naturewax C-3 are great for new candle makers.
Q: What is your bestselling paraffin container wax?
A: ProBlend 400.
Q: Which wax should I use for pillar candles?
A: For paraffin, we recommend ProBlend 450. For parasoy, we recommend ProBlend 650.
Q: Which wax should I use for tarts and/or wax melts?
A: We carry several tart and pillar blend including Golden Wax 494 soy wax, ProBlend 450 paraffin wax, IGI 4625 paraffin wax, and ProBlend 650 parasoy wax.
Please note - you'll need to perform your own testing to determine the wax that works best for you.
Errors and Troubleshooting
For all your errors and troubleshooting questions check out our troubleshooting page >>
For more help from our team, please submit a support ticket. Most questions are answered within 24 hours.
Article
How to Create Stunning Candle Gift Sets, Boxes & Baskets
A candle gift set becomes far more meaningful when it is handmade. Instead of gifting finished candles, assembling a basket or box filled with supplies allows the recipient to experience the joy of making their own. These DIY sets are creative, customizable, and perfect for a variety of occasions.
Why Candle Gift Sets Are the Ultimate DIY Gift
DIY candle gift sets stand out because they combine creativity with practicality. They provide the tools and materials to craft something functional, while also offering an engaging activity. A well-assembled set feels thoughtful and personalized, making it suitable for birthdays, holidays, or moments of appreciation.
For makers, bundling supplies into gift sets also creates opportunities for seasonal collections and themed packaging. Each basket or box is not only a gift, but also an experience waiting to unfold.
What to Include in a Candle Gift Basket or Box
The heart of any DIY candle gift set is the collection of supplies. Wax, fragrance oils, wicks, and containers should always be included, with clear instructions to ensure ease of use. Soy wax starter kits and beeswax kits make excellent foundations, giving recipients the basics to begin creating.
To enrich the gift, you might include additional fragrance oils so the recipient can experiment with different blends. Colorants or mica powders allow for personalization, while small tools such as thermometers or stir sticks make the process smoother. A sturdy basket or rigid box lined with filler not only protects the items but also adds to the excitement of opening the gift.
Examples of Great Candle Gift Add-Ons
Add-ons can transform a simple supply kit into a fully curated experience. A wick trimmer or pouring pot elevates the set by including tools that will be used repeatedly. A small journal for noting scent experiments encourages creativity and exploration. Decorative filler, tissue, or ribbon inside the packaging adds polish, making the kit feel special and ready to give. Each extra detail contributes to the overall sense of care and inspiration.
Types of Candle Gift Sets You Can Make
DIY candle gift sets can be adapted to match the skill level or occasion of the recipient. A beginner’s box may include a soy wax starter kit with pre-measured supplies and a step-by-step guide. A luxury box might feature frosted jars, high-end fragrance oils, and elegant packaging with metallic accents. Seasonal sets can highlight specific themes, such as cinnamon and pine scents for winter or floral and citrus oils for spring and summer.
Matching Candle Types with Themes
Choosing the right supplies helps tie each gift set to a specific mood or event. Aromatherapy-themed sets might focus on eucalyptus or lavender oils paired with natural soy wax. A holiday-inspired basket could feature cinnamon and vanilla fragrances with red or green colorants. Romantic boxes shine with rose, sandalwood, or amber oils, enhanced by decorative jars and elegant lids. By aligning fragrance oils, containers, and packaging, you create cohesive sets that feel intentional and memorable.
Best Candle Making Kits & Supplies to Use
High-quality supplies make all the difference in a candle gift set. Soy wax kits are ideal for beginners due to their clean burn and consistent results. Beeswax kits appeal to those who prefer a natural material with a subtle, honey-like aroma. A variety of fragrance oils gives recipients freedom to explore different profiles, while wicks in various sizes ensure proper burns.
Containers provide both function and style, with tins offering a rustic charm and glass jars delivering a polished, modern feel. Including labels or blank tags adds flexibility for personalization. For those gifting to first-time makers, a candle starter kit with carefully measured ingredients ensures an enjoyable and successful experience.
How to Package Candle Gift Sets Beautifully
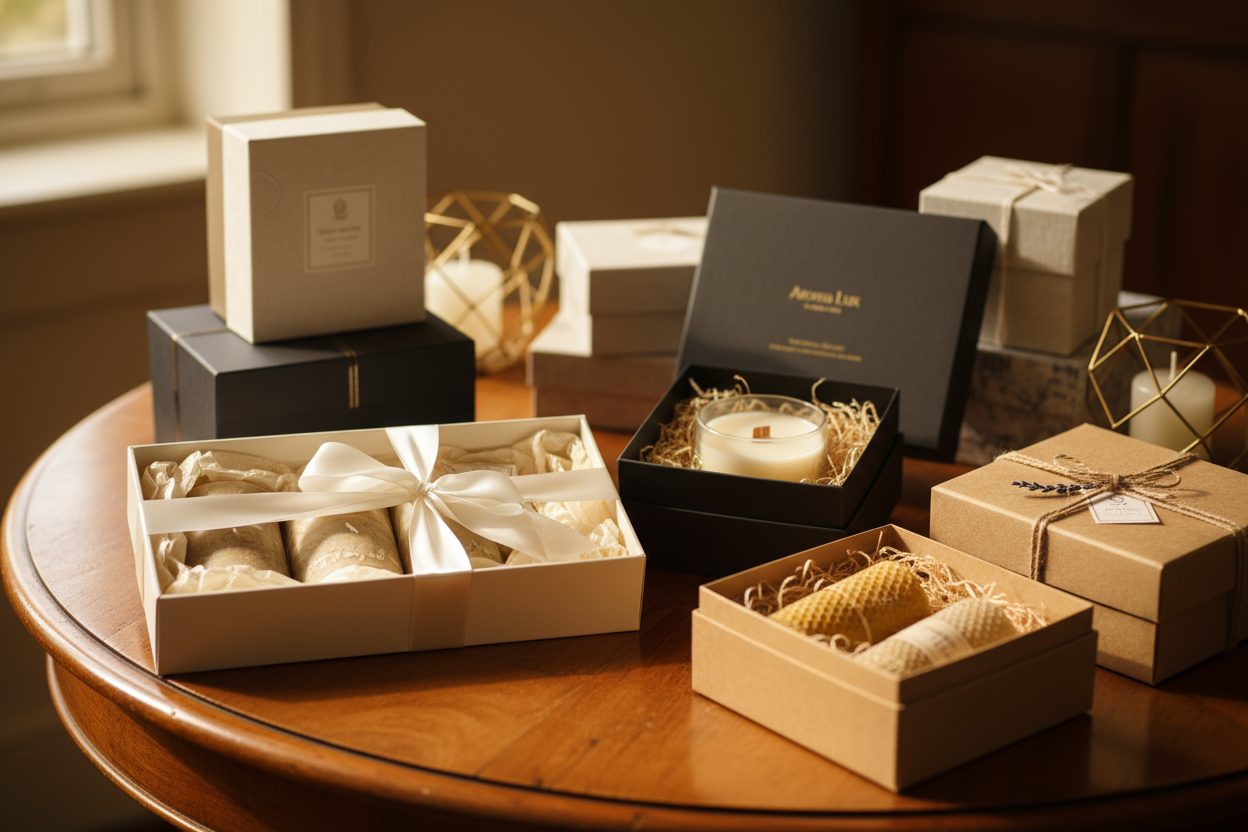
Presentation is essential to the appeal of a candle gift set. Choose packaging that secures the supplies while reflecting the theme of the gift. Wooden crates, sturdy baskets, or magnetic closure boxes work well as bases. Line them with shredded paper or fabric to cushion the items, then arrange the supplies in a way that feels organized and inviting.
Including an instruction card helps guide beginners through the process, while decorative touches like ribbons or sprigs of dried herbs make the set feel more personal. The unboxing should feel just as rewarding as the candle-making process itself.
Labeling & Personalization Tips
Labels and personalization provide finishing touches that elevate the experience. You can create custom labels for fragrance oils or containers inside the kit, or include blank labels so the recipient can decorate and name their finished candles. A handwritten note describing the inspiration behind the set adds a thoughtful element. For makers selling DIY kits, branding through cohesive labels, packaging, and color choices reinforces professionalism and creates a lasting impression.
Where to Sell or Share Your Candle Gift Sets
Candle-making gift sets are versatile, making them appealing in both personal and professional contexts. For hobbyists, they make memorable gifts for family and friends. For small business makers, selling curated supply boxes at craft fairs, online marketplaces, or through social media offers a way to connect with audiences who value creative, hands-on gifts.
Styled product photography and packaging demonstrations help potential buyers understand the value of the set. For those producing in larger quantities, sourcing supplies in bulk ensures consistent quality while keeping costs manageable.
Final Tips for Crafting the Perfect Candle Gift Set
The best DIY candle gift sets balance function, creativity, and presentation. Select reliable supplies that make the process enjoyable, then add opportunities for personalization through fragrance choices, colorants, and container styles. Pay close attention to packaging, as thoughtful presentation makes the gift feel more complete.
Above all, remember that each kit is more than just a basket of supplies, it is an invitation to create, to relax, and to craft something beautiful by hand.
Article
Fragrance Load Calculator: What Is My Fragrance Load?
Achieving the perfect balance of wax and fragrance oil is key to crafting candles with an excellent scent throw. Our Fragrance Load Calculator simplifies this process by helping you determine the exact fragrance load for your recipe. This ensures your candles are both safe and aromatic.
What Is Fragrance Load in Candle Making?
Fragrance load refers to the percentage of fragrance oil in relation to the total weight of wax used in a candle. It determines how strong the scent of your candle will be. Different wax types have varying maximum fragrance load capacities, which is why calculating the right amount is essential.
For example:
A soy wax fragrance load typically ranges from 6% to 10%.
Exceeding the recommended load can lead to issues like sweating, poor scent throw, or unsafe burning.
Using a candle fragrance load calculator ensures you stay within these limits for optimal performance.
Download the Fragrance Load Calculator
Check out our other calculator tools as well!
How to Use the Fragrance Load Calculator
Input your wax weight: Enter the total amount of wax you’ll be using, measured in pounds.
Add your fragrance oil weight: Input the amount of fragrance oil you’re planning to use, measured in ounces.
View your result: The calculator will display the fragrance load percentage, helping you adjust your recipe as needed.
Example Calculation:
Wax weight: 2 lbs
Fragrance oil weight: 2 oz
Formula:
(Fragrance oil weight / Total wax weight) x 100 = Fragrance Load %
(2 / 32) x 100 = 6.25%
This calculation confirms your fragrance load is within a safe and effective range.
Why Fragrance Load Matters for Different Wax Types
Every wax type has a unique maximum fragrance load capacity:
Soy wax: 6-10%
Paraffin wax: Up to 12%
Coconut wax blends: Up to 12%
Staying within these limits ensures:
Strong scent throw.
Proper burning and wick performance.
Reduced risk of fragrance oil separating or sweating.
Common Fragrance Load Percentages for Candle Makers
Here are typical ranges:
6-8%: Light scent throw, ideal for subtle fragrances or smaller spaces.
8-10%: Balanced scent throw, suitable for most candle projects.
10-12%: Strong scent throw, often used for larger spaces or specialty wax blends.
Tips for Optimizing Your Fragrance Load
Choose the right wax: Each wax type has specific limits, so always check manufacturer recommendations.
Test small batches: Experiment with different percentages to find the ideal fragrance load for your desired scent strength.
Weigh accurately: Use a digital scale for precise measurements of wax and fragrance oil.
Consider the environment: Higher fragrance loads may perform differently in hot or humid climates.
With these tips and our Fragrance Load Calculator, you can craft candles with perfect scent strength and performance every time. Download the calculator here and simplify your candle-making process!
Article
Can You Bring Candles on Planes?
Table of Contents
Solid Candles (Carry-On and Checked)
Gel Candles (The Exception)
Solid vs. Gel: Quick Reference (Source: TSA)
Tips for Flying with Candles
Frequently Asked Questions
Yes, you can bring candles on a plane. Solid candles fly the same way in a carry-on or checked bag: no size limit, no special container, no fuss. Gel candles are the one exception, since TSA treats them as a liquid and holds them to the 3-1-1 rule in carry-on. Here's the full breakdown, straight from TSA's current guidance, plus what actually matters once your candles are in the overhead bin or the cargo hold.
Solid Candles (Carry-On and Checked)
Solid candles, soy, paraffin, beeswax, any blend that holds its shape at room temperature, are allowed in both carry-on and checked bags. TSA doesn't cap how many you bring or how large they are. Whether it is one candle, or a full haul from your latest candle making session, it flies the same either way. That includes multi-wick jars, pillars, and anything else that's solid at room temperature, since TSA's rule is about the wax's physical state, not its size.
Scented candles get the exact same treatment as unscented ones. TSA isn't screening for fragrance, so a heavily perfumed pour won't draw more scrutiny at the checkpoint than a plain one. If you're weighing which scented candles to pack for a trip, TSA rules aren't the deciding factor.
Per TSA: solid candles are allowed in both carry-on and checked bags with no size or quantity limit.
Gel Candles (The Exception)
Gel candles are where this gets specific. Because gel wax has a semi-liquid consistency, closer to a thickened liquid than a solid pour, TSA treats it like any other liquid or gel. That means the 3-1-1 rule applies in carry-on: containers of 3.4 ounces or less, sealed in your one-quart bag, no exceptions. Most gel candles ship in containers well over that limit, so if you're traveling with one, checked luggage is the easier route. There, no size restriction applies, and the candle doesn't need to be repackaged into anything smaller.
Per TSA: gel candles are semi-liquid, so in a carry-on they follow the 3-1-1 rule (3.4 ounces or less); checked baggage is fine at any size.
Solid vs. Gel: Quick Reference (Source: TSA)
Candle Type
Carry-On
Checked Baggage
Solid (soy, paraffin, beeswax)
Allowed, no size or quantity limit
Allowed, no size or quantity limit
Gel
Allowed up to 3.4 oz under the 3-1-1 rule
Allowed, no size limit
Tips for Flying with Candles
Protect against heat and pressure. Cargo holds can run warmer than most people expect, and a hot tarmac can push temperatures well past 100°F before a plane even takes off. Wrap candles in soft layers of packaging so glass containers don't crack and wax doesn't shift against the jar.
Pack solids to avoid melting. Keep candles out of direct sun near cabin windows and away from anything that generates heat in your bag, including electronics that run warm in transit. If wax leaks anyway, our guide to getting candle wax on clothes will save the shirt it landed on.
Mind your supplies, not just your finished candles. If you're flying with fragrance oils or wax blocks instead of a finished pour, the rules shift again. Fragrance oils count as flammable liquids, so they're capped at the same 3-1-1 limits in carry-on. Solid wax blocks travel like solid candles: no restriction either way. Building a supply kit around our candle making guide before a trip? Pack the oils in checked luggage or ship them ground instead of flying with a whole case of them.
Check with your airline, too. TSA sets the federal floor, but individual airlines can add their own restrictions on top of it. A quick look at your airline's carry-on policy before you pack saves a conversation at the gate.
As of 2026, this is still TSA's standing guidance on candles. Rules can shift, so it's worth a quick check on TSA's site before a trip if you're bringing anything unusual, like a candle in an oversized vessel or a bulk order of fragrance oils.
Frequently Asked Questions
Can you bring candles in a carry-on?
Yes. Solid candles, including scented ones, are allowed in carry-on bags with no size or quantity limit. Gel candles are different: TSA classifies them as a liquid, so in carry-on they must follow the 3-1-1 rule, meaning containers of 3.4 ounces or less packed in your quart bag.
Are gel candles allowed on planes?
Yes, with a catch. TSA classifies gel candles as a liquid because of their semi-liquid consistency. In a carry-on, they must meet the 3-1-1 rule: 3.4 ounces or less, in a clear quart bag. Checked luggage has no such limit, so pack larger gel candles there instead.
Do scented candles set off TSA scanners?
No. Scented solid candles go through screening exactly like unscented ones. TSA doesn't treat fragrance oil or wax blends as a red flag, so a heavily scented candle won't get pulled for extra screening on that basis alone. Pack it in carry-on or checked without worrying about scent.
Can you check candles in luggage?
Yes. Both solid and gel candles are allowed in checked bags with no size restriction from TSA. The real risk is heat and pressure in the cargo hold, which can soften wax or warp a gel candle's container. Wrap candles well and pack them where they can't shift or crack.
Ready to start your next batch before your next trip? Browse Thee Flaming Candle and pack your favorites for wherever you're headed.
Article
Candle Batch Calculator: How Much Wax Do I Need?
Planning your next candle batch doesn’t have to be complicated. Our Candle Batch Calculator makes it easy to determine exactly how much wax you’ll need for your project. Whether you're crafting a single candle or preparing a large batch, this tool helps you achieve the perfect results every time.
What is a Candle Batch Calculator?
A Candle Batch Calculator is a simple yet powerful tool designed to help candle makers calculate the exact amount of wax required for their projects. By factoring in the number of candles, container size, and the weight of any additives like fragrance oil, it ensures you use the right amount of materials without waste.
This calculator is ideal for:
Beginners learning how to measure materials.
Professionals scaling up for bulk production.
Hobbyists aiming to perfect their candle recipes.
Download the Candle Batch Calculator
Check out our other calculator tools as well!
How to Calculate the Amount of Wax for Your Candles
Calculating wax for your candles involves a few simple steps to help you calculate how much wax for candle projects efficiently:
Decide how many candles you want to make: Multiply the container size by the number of candles.
Determine the size of your containers: Know the weight capacity (in ounces) of each candle container. Note: This should not be volume.
Factor in fragrance oil and more: Subtract the weight of fragrance oil and other additives from the total to calculate the wax weight. Use a standard fragrance load (6-10%) for accuracy.
Example:
Each container holds 8 ounces.
You’re making 10 candles.
You’re using a fragrance load of 8% (0.64 ounces per candle).
Calculation:
10 (candles) x 8 (ounces per container) = 80 total ounces. 80 - (10 x 0.64) = 73.6 ounces of wax needed.
Step-by-Step Guide to Using the Candle Batch Calculator
Input the number of candles: Enter how many candles you plan to make.
Enter the wax capacity of each container: Provide the size of your containers in ounces.
Add fragrance oil weight: Include the weight of fragrance oil you plan to use for your fragrance load.
Get your result: The calculator will provide the total amount of wax needed for your batch.
With this tool, you’ll save time and avoid over- or under-estimating your materials.
Frequently Asked Questions About Wax Calculations
Q: How do I calculate how much candle wax I need?
A: Multiply the number of candles by the container size (in ounces) and subtract the weight of fragrance oil based on your chosen fragrance load.
Q: Can I use the calculator for soy wax?
A: Yes! The calculator works for all wax types, including soy, paraffin, and blends.
Q: What is the typical fragrance load for candles?
A: Most candle makers use a fragrance load of 6-10%, depending on the type of wax.
Q: Is this calculator suitable for bulk production?
A: Absolutely! The calculator is designed to handle both small and large batch sizes with ease.
Q: Where can I download the calculator?
A: You can download the Candle Batch Calculator from The Flaming Candle.
Take the guesswork out of your candle-making projects with our user-friendly calculator. Download it today and create perfect batches every time!
Article
Fragrance Oil Calculator: How Much Fragrance Oil for Candles?
Creating the perfect candle requires precision, especially when it comes to adding fragrance oil. Our Fragrance Oil Calculator takes the guesswork out of the equation, helping you determine exactly how much fragrance oil you need for any candle-making project. Download the calculator to streamline your process and achieve consistent results.
How to Use the Fragrance Oil Calculator
Using our Fragrance Oil Calculator is simple:
Enter the amount of wax you’ll be using (in pounds).
Input the desired fragrance load percentage.
The calculator will instantly provide you the amount of fragrance oil (in ounces).
This tool is ideal for both beginners and experienced candle makers who want precise results every time.
Download the Fragrance Oil Calculator
How to Calculate Fragrance Oil for Candles
Calculating fragrance oil manually can seem complicated, but understanding the math behind it can help you achieve perfect results. Here’s the formula broken down:
Start with the weight of wax you’ll use: This forms the base of your calculation. Accurate measurement is crucial because the wax weight directly impacts the fragrance load.
Choose your fragrance load percentage: This determines how strong your candle’s scent will be. Fragrance load percentages typically range between 6-10%, depending on the wax’s capacity and your desired scent strength.
Multiply the wax weight by the fragrance load percentage: Converting the percentage into decimal form ensures the calculation is precise. The resulting figure gives you the exact weight of fragrance oil required.
Why This Calculation Works
The fragrance load percentage represents the proportion of fragrance oil in relation to the total wax weight. By multiplying the wax weight by this percentage, you’re calculating a balance that maximizes scent throw without compromising the candle’s structure. Using an appropriate fragrance load also ensures the candle burns evenly and safely.
Example:
For 1 lb of wax with an 8% fragrance load:
1 (wax weight) x 0.08 (fragrance load in decimal form) = 0.08 lbs (1.28 oz) of fragrance oil.
This method ensures your candles are both fragrant and functional, creating a professional-quality product every time.
How Much Fragrance Oil for Common Candle Sizes?
Here’s a quick reference for popular candle sizes:
8 oz candle: Use approximately 0.48–0.64 oz of fragrance oil for a 6–8% fragrance load.
16 oz candle: Use approximately 0.96–1.28 oz of fragrance oil for a 6–8% fragrance load.
1 lb wax: Use 0.96–1.28 oz of fragrance oil for a 6–8% fragrance load.
Using our Fragrance Oil Calculator for Candles ensures these measurements are accurate and easy to calculate.
Tips for Getting the Best Results with Your Fragrance Oil Calculator
Check your wax type: Different waxes, like soy wax or paraffin wax, have varying maximum fragrance load capacities.
Use quality oils: Higher-quality fragrance oils yield better scent throw and overall performance.
Measure accurately: Use a digital scale to ensure precision.
Follow safety guidelines: Avoid exceeding the recommended fragrance load to prevent issues like sweating or poor burn performance.
Frequently Asked Questions About Fragrance Calculations
Q: Can I use the calculator for essential oils?
A: Yes, the calculator works for both fragrance and essential oils.
Q: What’s the ideal fragrance load percentage?
A: It depends on your wax. Most candle makers stick to 6–10%.
Q: How do I calculate fragrance oil for a batch of candles?
A: Enter the total weight of wax you’ll be using into the calculator to determine the exact amount of oil needed for your entire batch.
Q: Can I exceed the recommended fragrance load?
A: No, exceeding the maximum can cause safety and performance issues, including wick clogging and poor scent throw.
Q: Where can I download the calculator?
A: On The Flaming Candle website!
By using this tool, you can perfect your candle recipes and create consistently amazing products. Download the calculator today and enjoy hassle-free candle making!
Article
Alternate Fragrance Comparison Guide
For candle makers looking to capture the luxurious experience of high-end perfumes without the steep cost, The Flaming Candle’s collection of designer-type fragrance oils has what you want. These scent-forward fragrance oil dupes are crafted to reflect the signature profiles of popular designer perfumes—giving you the creative freedom to build a premium-feeling candle line with reliable, affordable ingredients.
This guide walks through how fragrance dupes work, answers common questions, and provides a side-by-side comparison chart based on our in-house line.
What Are Designer-Type Fragrance Oils?
Designer-type fragrance oils are created to match the general scent profile of well-known perfumes, colognes, and signature home fragrances. While they don’t replicate formulas note for note (and can’t use trademarked names), they offer a familiar aromatic experience for customers who know and love those originals.
Each fragrance is made using a blend of synthetic aroma chemicals, natural isolates, and essential oils when applicable—all designed for candle making. At The Flaming Candle, our designer-type fragrances go through rigorous and thorough testing for scent throw, stability, and safety to ensure they work across wax types, from soy to paraffin.
Are Fragrance Dupes Worth It?
For most small-batch candle makers, fragrance dupes offer a high-value way to meet customer demand for recognizable scents without overextending on raw material costs. Here’s why they’re worth considering:
Cost Savings Sourcing actual designer perfumes for candles would be financially unrealistic and legally problematic. Fragrance dupes provide a safe, budget-friendly workaround.
High Performance The Flaming Candle’s oils are made for candle use, meaning they throw well hot and cold and are often more stable in wax than essential oils or diluted perfume bases.
Familiar Appeal People love recognizing an aroma. Being able to say a candle smells like something that sparks joy, gives it an immediate place in someone’s memory.
Creative Flexibility Since you’re working with familiar bases, you can layer designer-type oils with complementary scents to create hybrid blends that still feel elevated and original.
The Flaming Candle Fragrance Oil Comparison Chart
Here’s a quick-reference guide comparing some of our top-performing designer-type fragrance oils with the scents they’re inspired by. This is a working reference—always test in your wax base to ensure the experience meets your expectations.
The Flaming Candle Fragrance Oil
Inspired By
Bombshell (Type)
Victoria’s Secret Bombshell
Amber Romance (Type)
Victoria’s Secret Amber Romance
Volcano (Type)
Capri Blue Volcano
Sweater Weather (Type)
Bath & Body Works Sweater Weather
Twilight Woods (Type)
Bath & Body Works Twilight Woods
Tis the Season (Type)
Bath & Body Works Tis the Season
Fierce (Type)
Abercrombie & Fitch Fierce
Polo Red (Type)
Ralph Lauren Polo Red
Narcissist (Type)
Narciso Rodriguez For Her
Gain (Type)
Gain Laundry Detergent (Original Scent)
Storm Watch (Type)
Yankee Candle Storm Watch
Strawberries & Champagne (Type)
Victoria’s Secret Strawberries & Champagne
Note: These are fragrance oil dupes—not exact matches or formulations. All fragrance oils at The Flaming Candle are free from trademarked branding and follow IFRA usage guidelines.
How to Work With These Oils in Candle Making
Designer-type fragrance oils behave similar to other premium fragrance blends. Here’s how to get the most out of them:
Use within safe loading limits
Each fragrance oil includes recommended usage percentages by wax type. Always refer to the IFRA certificate and conduct wick testing to confirm your final formula is safe and effective.
Expect layered scent profiles
Because these oils are inspired by perfumes, you’ll notice that they often include strong top, mid, and base notes. In candles, this means the hot throw can evolve as the candle burns—similar to how perfume changes on skin.
Store properly
To maintain stability and integrity, keep your oils tightly sealed in a cool, dry space away from light. Designer-type blends can be more sensitive to storage conditions.
Can I Blend These With Other Oils?
Absolutely. Many candle makers layer designer-type oils with single-note fragrance oils to adjust sweetness, depth, or freshness. For example:
Add a Citrus Burst to brighten up Amber Romance (Type).
Layer Warm Vanilla Sugar (Type) with Twilight Woods (Type) for a sweeter base.
Try Mahogany Teakwood (Type) and Sweater Weather (Type) together for a crisp, cozy blend.
As always, test small batches to see how your combination behaves in your chosen wax and container.
Final Thoughts
Fragrance oil dupes aren't just a budget alternative—they’re a creative tool that lets candle makers offer popular scents without needing expensive raw materials or licensing agreements. With The Flaming Candle’s designer-type collection, you have access to a curated range of scents that evoke the feel of beloved perfumes and lifestyle brands—without compromising on performance or safety.
If you're developing a new line, running seasonal experiments, or just curious what your favorite perfume might smell like in wax, these oils are a smart place to start. Explore our full collection now.